Showing posts with label SFYTT. Show all posts

Tuesday, November 11, 2014

Reverse Confetti - November SFYTT


Hello Everyone, its time for another Sketch For You To Try @ Reverse Confetti Blog.


For my card I used Branch Out Confetti CutsPretty Panels: Mini Circle Garland Confetti CutsLet it Snow Confetti CutsSeasonal Sentiments

To begin my project I first distress the bottom of the card panel then adhered the patterned papers on the middle of the card. Next, I die-cut the Pretty Panels: Mini Circle Garland Confetti Cuts using a gold cardstock. Then I die-cut the Branch Out Confetti Cuts and adhere it on top of the Pretty Panels: Mini Circle Garland Confetti Cuts. Then I stamped the sentiment from Seasonal Sentiments. To finish off the card I added some gold sequins from Pretty Pink Posh. I also added some wood veneers stars from the past PPP released.


I hope you guys enjoyed!


Thank you so much for stopping by!
For more inspiration, please stop by at Reverse Confetti Blog.


Have a Wonderful Day!


Friday, August 1, 2014

Fabulous Flamingo


Hello...petti fans...the time has come for another...Sketch For You To Try 
@ Reverse Confetti Blog.


For the top panel I first distress it with Peacock Feather ink pad, then I adhere the die-cut  vellum paisley. I Next. I adhere the sentiment that I gold embossed on vellum with clear dimensional tape. To finish off the card I added some sequins from Pretty Pink Posh, Marshmallow in flat, Aquamarine in 4mm, and the yellow flower on neck of the flamingo is from the Summer Embellishment Kit


I hope you enjoyed!
Don't forget to check out what the other gals created @  Reverse Confetti Blog


Thank you so much for stopping by!

Have a Wonderful week Creating :)

Tuesday, July 1, 2014

Reverse Confetti - July SFYTT

Hello...hello its time for Reverse Confetti
Sketch For You To Try #14


For my card I played with the distress inks again. To start my watercolor panel, I simply smooched the ink pad on my heat mat then spritz it with water, and smooched the watercolor paper on the mat and dry. Next, I heat embossed the gold embossing powder using the RC stamp and confetti cuts from HERE WE GO for the submarine and the sentiment for the focal point.

The gold splatter on the card base is from Heidi Swapp Color Shine in Gold.
I also added some Sparkling Clear sequins from Pretty Pink Posh to finish off the card.


I hope you enjoyed!


Don't forget to play with us at Reverse Confetti blog.

The sketch link list will be open from the 1st until noon CST on the 14th. The SFYTT button is  posted on the sidebar.  Click on it to be taken to the current SFYTT post and link list.
Reverse Confetti stamps are required to win.  This is a way we get to thank our customers for using our stamps.  Anyone is welcome to play, though!
You may enter as many times as you wish.
There will be a winner each month and that person will receive a $20 gift certificate to the Reverse Confetti store and claim the title of ‘Fetti Fave. The winner of SFYTT will be posted on the Reverse Confetti blog on the 15th of each month.


Also the New Release products will be available....


Thank you so much for visiting!

Have a FAB day!!!

Sunday, June 1, 2014

Sketch For You To Try #13


Hello...hello..its time for another SKETCH FOR YOU TO TRY @ Reverse Confetti.
I hope you guys are not tried of seeing more Happy Birthday card from me *wink* lots celebrating in my family and
 friends couldn't keep up with it :)

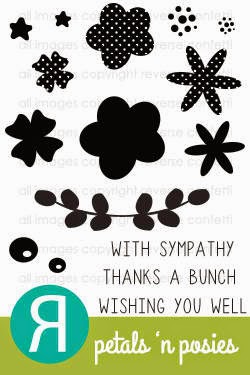
For my sketch I used the PETALS 'N POSIES stamps and Confetti Cuts.
I also used the BEAUTIFUL BANNERS stamps and Confetti Cuts.


1. To begin my card I first cut a patterned paper and adhere on my card base.
2. Then I cut a watercolor paper just a little smaller from my A2 card base and watercolor the bottom of the paper let it dry and adhere on the card.
3. Next I cut another strip of pattern paper and adhere.
4. Then, I die-cut from a white cardstock using the circle die and distress all around to match my pink and peach color scheme.
5. Then, I stamped the images and sentiment then die-cut and adhere with foam dots for dimensions.
6. To finish off I just added some Pretty Pink Posh Marshmallow sequins.


Here's the full view of the card.


I hope you enjoyed :)
Thank you so much for visiting.
Can't wait to see what you guys will create using Reverse Confetti products.

Have a great time creating :)


 Petals 'N Posies           Petals 'N Posies Confetti Cuts


 Beautiful Banners          Beautiful Banners Confetti Cuts