Showing posts with label Waffle Flower. Show all posts

Saturday, August 23, 2014

Waffle Flower - Gift For You

Hello Everyone….
It’s a card share using Waffle Flower Crafts Starry Night,
A Homemade Christmas, and Loved stamp sets.

To begin my card I first cut the white panel smaller than an A2 card then stamped the “Gift For You” sentiment from A Homemade Christmas. I also added the dots and stars from Starry Night stamp set.  I just made sure I have a space at the middle of the panel to add the gifts and tree image (form into a gift cone) from A Homemade Christmas.
The bow is from the Loved stamp set and dies. The tree image and bow were adhere on the panel with foam tape. The whole panel was attached on the red panel size of the A2 card which was adhered on the white card base.


Here’s the full image.


I hope you enjoyed!

Thank you so much for stopping by!
Have a Wonderful Weekend J

Wednesday, July 16, 2014

Add Images on your Mailable 3D Bow Template Die

If you are looking for the Reverse Confetti July Color Challenge please click HERE.
If you are looking for Day 3 post for Neat & Tangled please click HERE.
.............................................................................................................................................


Hello Everyone....this is my third post of the day :).
I know many of you really love the Mailable 3D Bow Template Die.
I want to show you how easy to stamped your images on the bow to create a unique customize design. 
Any of the Waffle Flower Crafts stamp images will work or any of your stamp images that you already have will work as well.


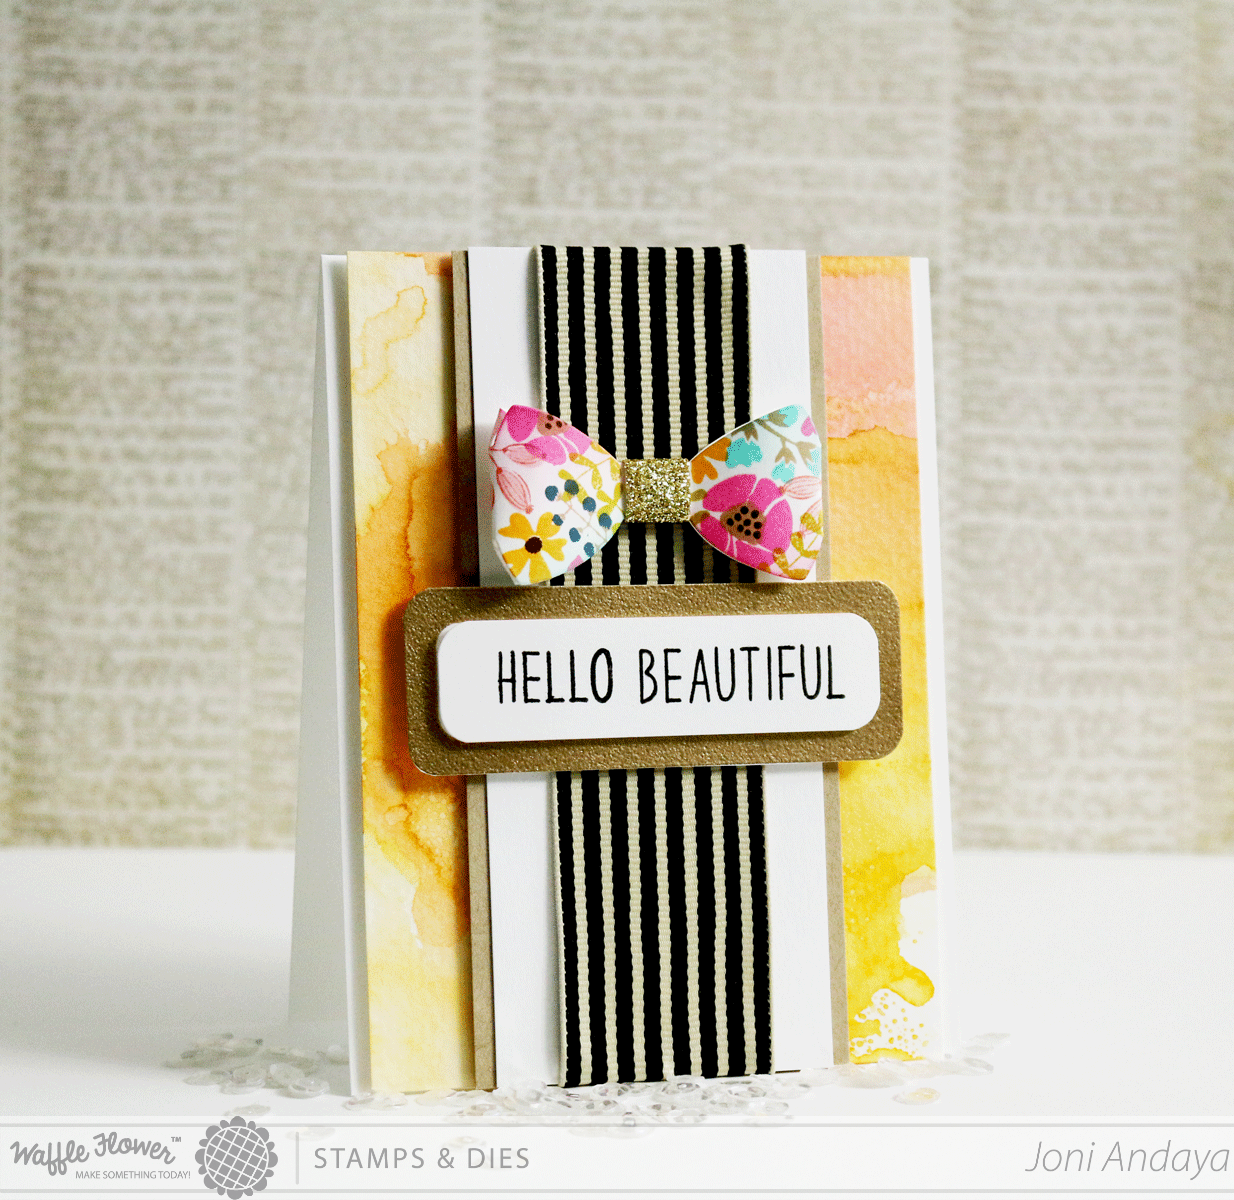
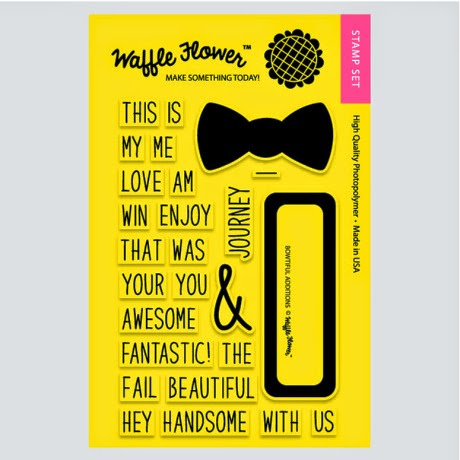
For my card project I used the products BOWTIFUL ADDITIONS (label border),
 MAILABLE 3D BOW TEMPLATE Die (bow), and LOVED stamp set (flower images)

THE PIECES: White card base, Watercolor paper that's smooched on the heat mat with water distress inks, strip of kraft cardstock, strip of white cardstock, black/white ribbon stripe from May Arts, fussy cut 
label (I changed it from pink to gold embossed instead) from BOWTIFUL ADDITIONS, the sentiment "Beautiful" is also from Bowtiful Additions "Hello" from BOWTIFUL stamp set.


Here's How I created the BOW, stamping the images from LOVED stamp set. You
can also use other stamps from Waffle Flower Crafts if you prefer.


The way it looks when it all comes together adhering the pieces with foam tape.


Here's the full image.

I hope you enjoyed!
Thank you so much for visiting me :)


Have a GORGEOUS week Creating!!!


Mailable 3D Bow Template Die

LOVED stamp set 

BOWTIFUL ADDITIONS


Saturday, June 28, 2014

Surface Tag


Hello Everyone...today I am sharing with you some of the projects I created using the new release SURFACE TAG stamp set, Surface - Tag dies starter Kit, and Surface - Tag Scallop add-on.
There are just so many possibilities with this kit. The Waffle Flower design team will have a special post on July 5 on different unique ways of using this set :).

For my first project is very simple I used different patterned papers and die cut the tag from the Surface - Tag dies starter Kit, but instead of using the full size of the tag I made it shorter. I did this by hanging the portion of the tag on die-cut before die-cutting it. 


Next, I die-cut the double ended tag enforcer that's included with Surface - Tag dies starter Kit  on gold cardstock and adhere on top of the tag then adhere the tag with foam dots.
To finish of the card I gold embossed the sentiment "Happy Birthday" from the SURFACE TAG stamp set  and adhere on the top of the cut black piece of card stock on the tag.


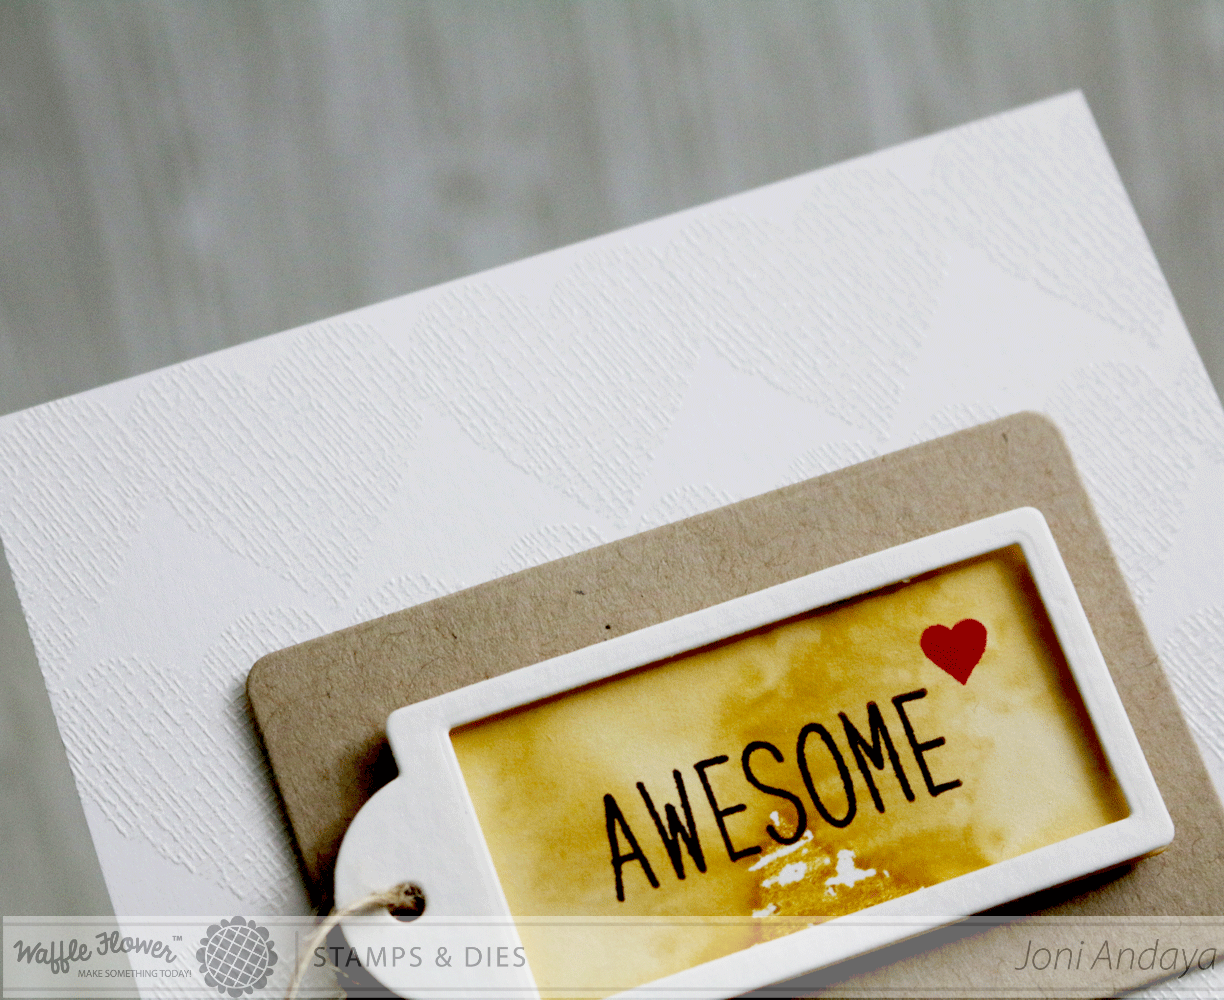
To begin my second project, I created my card base then white heat embossed the heart image that's included on the SURFACE TAG stamp set. I stamped the heart on the whole card base as a subtle background. I hope you can see it in this image :).


Next, I die-cut the kraft cardstock using the rectangle die-cut for the tag that is included on the Surface - Tag dies starter Kit. I have to shorten the kraft tag, to shorten the rectangle tag I place the cut tag hanging at the end of the die to the portion of the tag.


Next, I die-cut the smaller tag die on the set and watercolor it in and let it dry. Once its dried I then stamped the sentiment "Awesome" from  the BOWTIFUL ADDITIONS stamp set and added the tiny heart from SURFACE TAG stamp set. I also die-cut another tag and used the small rectangle die from the Surface - Tag Scallop add-on to create a window then adhere with foam dots.


For the tag round reinforcer die, after die cutting I cut the middle of the sentiment on the middle like you see below. I did this to help the sentiment "thank you" to bend to fit on reinforcer. It does not damage the stamp it goes back on the same shape once I am done with it :). I really love that this small image can add so much on the project.


Here's the full image.


For my last project, I want to show you first the pieces that I used for my card.
On this project I used the rectangle die that's included on the Surface - Tag dies starter Kit, I also gold embossed the string image from the stamp set. I also used the round reinforcer and die-cut it on gold cardstock. The "Happy Birthday" sentiment is also from the stamp set. For the panel for this card I use a watercolor paper and did some watercolor using distress ink pad.

The larger rectangle tag I folded it to house the smaller tag on my card to create a pouch and adhere the gold embossed "just because" sentiment.


Here's the full image.


I hope you enjoyed!
Thank you so much for visiting me.

Have A Wonderful Weekend!

Friday, May 16, 2014

Love You Sew Much!


Hello Everyone....hurray for Friday :) I am sharing a card I made for Waffle Flower Crafts.
I just cannot stop using the bows from the BOWTIFUL stamp set...hehehe this bows are so easy to add to any project.


For this project I first created a separate panel for my card. I then stamped the button image from the NOTIONS stamp set at the bottom of the cut panel, then left a little space in between to add the pink stamped and die-cut bow from BOWTIFUL stamp and die set. I also stamped some tiny hearts from the Bowtiful set as well :).

Next, I distress the bottom of the card base with Picked Raspberry and then stamped the sentiment "Love You Sew Much" from NOTIONS stamp set. I then added a pink die-cut heart from using the TINY HEART die. After everything all stamped, I then adhere the panel with foam dots for dimensions.


Here's the full view of the card.


I hope you enjoyed!

Thank you so much for visiting me.
Have Wonderful weekend :).

Monday, May 5, 2014

Waffle Flower Blog Hop!


Hello...hello...


Welcome to Can You Felt It? - Waffle Flower Blog Hop! Today is the 5th of the month and also the day that the design team girls get together and share some fun craft projects using our newest stamps and dies released in April. If you came from Nina's blog, you are right on track!


We teamed up with Benzie Design and are sharing some felt projects today! 


For my first project I created a bow hairpin using the Mailable 3D Bow Template Die. Before going to the bow let me tell you about the card first real quick, for the card base I stamped the tiny stars from Bowtiful stamp set and used the sentiment from Notions stamp set. 

I then cut strips of felt from the Kitschy Christmas collection I picked at Benzie Design


To finish off the card I added different colors sequins from Pretty Pink Posh 6mm & 4mm sizes.


I tread the hair pin in the Mailable 3D Bow Template Die.

 Then I cut a tiny piece of the felt and glued it on the bow so that my hairpin will not move.

Here's the look when its all glued up.

Here trying on the bow :)


I just kept my bow simple...of course you can embellish this with your heart desires.

Here's the full look of the card.


For my second project I created a card using the gorgeous felts and created my flower by hand cutting round shapes using my scissors. The round shape did not have to be perfect..although of course you can use any round die-cuts for this :). The felt I just stacked them together and added the raspberry sequins from Pretty Pink Posh. 

For the background I also used the tiny stars from Bowtiful stamp set which I cannot stop using *wink*. I also used my copic markers to create my ground and grass when I glued my felt flower on then ...voila!


I simply just hand cut the leaves just by folding the felt together for easy cut. The sentiment is also from the Bowtiful stamp set. I stamped the sentiment on a cardstock, cut, and adhere with foam tape for dimension.


Here's the full look of the card.


I hope you guys enjoyed my felt projects!


Waffle Flower http://waffleflower.com/
Suzanne Dahlberg http://freshlynoted.com/


GIVEAWAY!
Leave comments along the way for chances to win a stamp set of choice from Waffle Flower Crafts. Enter before midnight Eastern on May 8 and the winner will be announced on Waffle Flower Blog on May 9th.


Have a WONDEFUL week :)
Thank you so much for visiting!

Monday, April 28, 2014

All About Father


Hello...hello..
Its time for another card shares for Waffle Flower.
Father Day's card is almost around the corner and Waffle Flower have this great Hey Mr. stamp set


On my first card, I first created my card panel same size as the A2 card.  To create my paint streaks is to cover my panel with post-it and color it every 1 inch or so, once the color is achieve then I stamped the paint brush image from the set. I then added the largest sentiment and added the stars that are part of the set. Next I added the bucket of paint at the bottom then color the bottom of the bucket of paint with copics to ground my image.


On my next card. I first created my panel a little bit smaller than the A2 card. Next I distress the bottom using the Distress Ink Antique Linen with a mix of Tea Dye. Then, I stamped the images on top of the panel. For the images I covered the parts with Washi each each time I stamped my image to create the multi colored look. Next, I stamped sentiment below the tool,stamped the tool box,and nails at the bottom to finish off my card.

I hope you enjoyed!

Thank you so much for visiting.
Have a Great Week :)


Monday, April 21, 2014

BLOG HOP Waffle Flower with Pretty Pink Posh


Hello...hello... I hope you enjoyed your weekend.
Waffle Flower is kicking the week with a Blog Hop.
Waffle Flower Crafts is sponsoring the Sequin Shaker Blog Hop 
hosted by Pretty Pink Posh on April 26th! 

So don't forget to link-up your fun Sequin Shaker card on April 26.


Here's my shaker card featuring the Bowtiful stamp from Waffle Flower and the gorgeous sequins from Pretty Pink Posh Marigold, Orchids, and Amethyst


First I created my card base, then created a panel using kraft cardstock, die-cut with bowtiful die "the smaller bow" I then drew some faux stitch lines on the border of my die-cut.

Then stamped the tiny stars from the bowtiful set and my panel is ready. But before adhering the acrylic on at back of my kraft panel I then stamped my bow images with different colored inks on my card then voila!


I then adhere some foam squares surrounding each bow so the sequins will not fall.  To finish off the card, I then stamped the sentiment on a white cardstock and adhere it on a gold foil cardstock and I am done.


Here's the final look of the card.


I hope you enjoyed.

Your next stop will be on Katie's Blog.

Nina Yang
Katie Gehring
Kim Kesti
Lorena Cantó
May Sukyong Park
Suzanne Dahlberg


Don’t forget to check out the Pretty Pink Posh Blog on the April 26!

If you need more sequins for the hop you can just use the coupon code BLOGHOP to save 15% on your order at Pretty Pink Posh from now through the hop day.


And join the blog hop to win some goodies from these awesome companies! 
Including Waffle Flower Crafts!


Here are the other participating sponsors.


Thank you so much for visiting.
Have a BOWTIFUL week :)


Wednesday, April 16, 2014

Live Laugh Love & Giveaway

EDITED: Congratulations Kimberly per random generator #33 you are a winner!

Please e-mail me so can give you your prize! 
Thank you so much for all of you who participated....we will have more Giveaways to come :)

.................................................................................................................................................


Hello...hello...I hope you are having a gorgeous week, today is my official (first) post for Waffle Flower as one of their design team member. I am so excited to share with you some of the products of this new company.

Today I am showcasing the ROCK MY WORD and BOWTIFUL stamp set.


For my first card, I first created my card base then colored only the sides of my card base with copics to match the color that I used on my card panel. On the card panel I stamped the sentiment that is included in the set "Live Laugh Love". The lines that you see that I created to mimic the square image, is also from the set. Although, you can also use this as a grass as well :).


To create the bow, I die-cut the middle of the panel using the coordinating die from the Bowtiful stamp set and I also die-cut the PTI raspberry fizz cardstock five times and glue them together, to create a great dimension. To finish off the card I splatter it with Studio Calico in Shine and used the Pretty Pink Posh sequins in Lemon Meringue, Marshmallow. and Sparkling Clear.


Here's the full image of the card.


For my second card I started stamping the tiny heart image from Bowtiful Stamp set. I then stamped the tiny rocks from the Rock My World first on the card base then some on a separate cardstock, where I fuss cut some. I adhere the tiny rocks with foam dots to create a holder for my sentiment from Bowtiful and added the coordinating stamp and die. You can also see the bottom of the rocks where I added the grass image and added more grass using Copic markers.


Here's the full image.


For my final card, I first stamped one of the rock image then stamped the tiny rock around the big rock to create a flower.


After stamping, I then fussy cut the flower image and added some foam dots for dimension. The tiny flower is also included from the Rock My World stamp set, which I stamped the back side first then stamped the flower outline image. Stamping the flower this way creates more depth to the image as a whole. As for the sentiment I used the "Hello" and "Enjoy the day!" from Rock My World. The"Enjoy the day" is part of a much larger sentiment from "Hope that you slept like a Rock Enjoy the day!" I just mask the other sentiment with washi and viola! To finish of the card I added some Pretty Pink Posh sequins and there you have it :)


Here's the full card image.


In celebration of the new release of Waffle Flower products, I have a $10.00 gift certificate to give away for the Waffle Flower Crafts store.  Just leave me a comment by 8 p.m. on Sunday, April 22 for your chance to win. 

I also have a coupon for the Super CUTE heart die for FREE with your order of $50.00.  


I hope you enjoyed!

Thank you so much for visiting me :)
Have a Gorgeous week!