Showing posts with label The Big. Show all posts

Thursday, July 16, 2015

Happy Birthday Julie!


Hello Everyone, its a special month for one of my friend at Winnie & Walter. Julie Mogford is celebrating her birthday, in honor of that I created a card just for her.


For this special card I used....
Sugar Rush stamp set


To begin this card I first watercolored the watercolor paper close to the shape of the die-cut flower from In Bloom: Maggie's Roses Cutaways. Next, I adhered the die-cut pieces from the In Bloom: Maggie's Roses Cutaways on the watercolored once it dried.

Next, I added the "birthday" die-cut from The Big, the Bold and Party Cutaways that was distressed from the bottom, and die-cut 4 times then adhered on top of the other for dimensions. I also stamped the "happy" sentiment from the Sugar Rush stamp set.

I also added some Pretty Pink Posh Sparkling Clear sequins to finish of the card.


I hope you guys enjoyed!

Thank you so much for stopping by.
Have a Wonderful Week :)


Tuesday, February 24, 2015

The Big, the Bold Cutaways


 Hello Everyone, this week Winnie & Walter and the team are showcasing the recent released Cutaways from January 2015. For my card today I used, The Big, the Bold and Party Cutaways.


To begin I die-cut several of the "celebrate" from the The Big, the Bold and Party Cutaways. I then glued all the die-cuts on the light gray panel to create a die-cut background for my panel. This will also work to use different colored die-cuts for the background of the panel.


Next, I stamped, colored, and fussy cut the door, windows, and flower plant from the This Awesome House stamp set, to create a welcome home card.  The sentiment is stamped on a strip of black cardstock.To finish off the card I added some Pretty Pink Posh Sequins.


I hope you enjoyed!

Thank you so much for stopping by.
For more inspiration.

Please stop by at Winnie & Walter.


Have  a Fantastic Week.


Tuesday, January 27, 2015

WinnieWalter - Day One Release Previews


Hello Everyone, welcome to Day 1 Winnie & Walter January Release 2015!
I hope you guys are just as excited as we do :)

For today I am sharing the font that we all came to love. Another installment of the famous The big and the bold sentiments for this release its all about celebration. The Big, the Bold and Party stamp sets with its Coordinating Cutaways that will be Available for purchase on January 30th.


To begin my card I cut a 6 1/2 by 4 inches card base and distress all sides with Distress ink in Wild Honey and Picked Raspberry. I then cut a white cardstock for the front panel of my card and stamped the images, some I stamped on a separate white cardstock fussy cut then distress. Next, I stamped some of the dot images from Scenery: Big Bang Confetti stamp set. 

For the sentiment "Celebrate" I stamped it on a white cardstock, fussy cut, and adhere on the middle of the card. To finish it off I added some Pretty Pink Posh sequins in Marigold, Sweet Blush, and Pretty Peonies in 4mm/6mm.


I hope you guys enjoyed!

For Inspirations and Giveaways please visit
Winnie & Walter.


Have a Wonderful Week.


Wednesday, July 23, 2014

Premiere of The Big, the Bold and Seasons - Day 3


Hello..hello we are the stretch of the WINNIE and WALTER released!
Day 3 is all about....The Big, the Bold and Seasons.
Includes thirty (30) stamps with four (4) large words: autumn, spring, summer and winter, four (4) icons and twenty-two (22) small words


For my card I used the pretty word "summer" since I moved here to north CA I have been missing the real summer in the east coast FL.

I decided "summer" will be perfect for ice cream. I created my image by watercoloring the ice cream on the watercolor paper. I drew the ice cream shape with a light pencil mark on my watercolor paper, and then cover it with distress ink that I diluted with water on heat mat. 


For the cone image I used one of the pennant image from Scenery: It's a Wonderful Pennant. I stamped the image first on the watercolor paper using very light ink the Antique Linen distress ink is perfect for this effect. After stamping with light ink, I then color it with a darker ink like Vintage Photo distress ink. Distress markers will work very well too, I usually let it dry every layer of my color before watercoloring it again to get the intense color I am going for.


When all the coloring and cutting are done I simply adhere the ice cream on the cone and added some foam tape for dimension. The card base I used is also watercolor paper, I did some ink splattering before adhering the cone.

For the sentiment "have a" and "fun" are from the past released The Big, the Bold and Fun. The "summer" sentiment that will be released this July 25 is heat embossed in gold on vellum, fussy cut, then adhere with clear foam tape.

To finish off the card I added some self-adhesive white and gold pearls from Creative Imaginations.


I hope you enjoyed!
Thank You so much for stopping by!

Remember all the products will be available on July 25th at midnight.
Also, don't forget to stop by at Winnie and Walter's blog they are doing a GIVEAWAY!


Have a WONDERFUL week :)

Sunday, January 12, 2014

Premiere of The Big, the Bold, and the Happy


Hello...hello this is the second day of sharing the premiere stamp sets for
Winnie & Walter


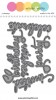
I am so excited about this stamp set, the 3 large sentiments in this set are pretty big "Love, Hello, & Happy" which also includes other smaller sentiments where you can easily add to your projects.

Which includes:
you, everything, so, from, I, holidays, life, mail, baby, birthday, me, in, father's, my, mother's, year, day, valentine's, always, for, anniversary, to, new, and, friend, with, love, happy, hello

Its a must have...look at those pretty big sentiments....Love!
Never ending possibilities with this one if you ask me.

Here are just a few projects created using this set.
For my first card, I used the big "love" sentiment and stamped it randomly on my white card, then when
I was satisfied  I then added the "I love you" smaller sentiments that are part of the set.

I also added some little stars and dot images on my card using the stamp set
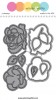
Scenery Big Bang Confetti that we featured yesterday.
If you have not seen it yet you can see my projects HERE &  other DTs work HERE.

To finish of my card I added a White Seam Binding ribbon, Natural Twine, and a pink
Resin flower from Kaiser Craft.


Here's the full view of the card.


For my second card I used the big sentiment "happy" on this set.
What I did first, I embossed the big happy sentiment on a separate white cardstock and distress it with
Ranger Distress ink with Wild Honey, then I fussy cut the sentiment.
The sentiment is pretty big which are so easy to fussy cut. Then put it away for the mean time then move on
to my background for my card.

Before I stamped all my images I first distress the bottom of my card using Ranger Wild Honey.

I did not cut a panel this time I just stamped the images directly to the card it self.
He.he.he..those circle, bubble, star images from the Scenery Big Bang Confetti are so addictive to stamp.
I am so in love with that set. Its just so easy to use on your projects, especially if you want to create
a bokeh effect.

 I then added the chipboard postcard from Prima called Anna Marie. I then adhere on my
card and adhere the "happy" sentiment I fussy cut with foam dots for dimension.

I also added the small "birthday" sentiment from the set white embossed on my raspberry fizz
cardstock from PTI, cut it then adhere on my post card chipboard with foam dots as well :)

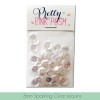
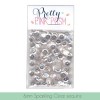
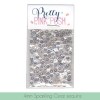
To finish of my card I added some Marshmallow, Clear, and Sweetheart Mix 
sequins from Pretty Pink Posh and voila its done :)


Here's the full image of the card.


For my third project I created a tag.
On this project for my tag I also stamped some few images from
 Scenery Big Bang Confetti.


 I used the Delight Modeling Clay  (I got it at Michaels) where I stamped my big "hello" sentiment.  Just let it dry for a day and its pretty pliable when it dries, so you can
cut it or die-cut it if you prefer.

For mine I just shaped it with my hand and let it dry.

When its all dried up I then added  Wink of Stella Clear Glittered brush
on the crevices of the sentiment on the clay to add shine :)


Just another view, I hope you can see the shimmer from the "hello".


Here's another look of the tag :)


I hope you guys enjoyed.

Don't forget to stop by @ Winnie & Walter blog for the stamp Giveaway.

Also don't forget to check out the other DTs for their fabulous project ideas.
Vanessa
Kelly
Heather
Suzanne


Special Guest Today
Stephanie Washburn


Thank you so much for visiting me!
Have a Marvelous day!