Thursday, February 27, 2014

CAS(E) this Sketch #66

Hello Everyone,
Happy Thursday and another
CAS(E) this Sketch week.

The sketch for this week is pretty simple but loads of possibilities :)


For my sketch...I created a shaker card using Wplus9 stamp sets from
Dockside, Dockside Background, Country Charm, More Fresh Cuts, Stackers Rounded Rectangles, Nautical Notion Die, and Happy Trio Dies.

1. First I created my card base from a white cardstock, I first stamped my bird image and sun using the wrong side of the tiny life saver image included in the Dockside stamp set. Then did a little ink distressing.
2. Then, I created a panel same size of the A2 card then stamped it with wood grain background and the bottom of the panel I stamped it with the rope image also from the same set  Dockside Background
3. This is where I cut my window using the 2nd to the largest of the  Rounded Rectangles. After cutting the window I cut another panel this time using the largest of the Rounded Rectangles where I stamped the stripes using the Country Charm with the Wplus9 Lake House pigment ink.
4. Next, I attached my clear cardstock panel at the back of the window, then attached some foam dots to help my sequins move around. The sequins are from Pretty Pink Posh cornflower, cobalt, and clear.
5. I die-cut the boat image from the stand alone Nautical Notion Die. I colored the boat with my Copics but the sail I stamped it with images from More Fresh Cuts. This is a retirement card for a female after all *-* adding the flower image that way I think is better if you don't want a bulk when you mail it :)


6. I added the "happy" die from Happy Trio Dies just recently released for the month of February. The "retirement" sentiment is from Dockside stamp set which I cut and adhere it with foam dots for a little dimension.


Here's the full look of the card.


I hope you enjoyed my Nautical flower retirement card.

Just click HERE to join the stamping fun.

Thank you so much for visiting me!
Have a Fabulous day :)

Friday, February 21, 2014

Trend Watch Challenge - Happy


Hello Everyone....
I just received my orders from Wplus9 release :)
I must say....  I Love...love it!!!

I made this card to play with the new TREND WATCH CHALLENGE going on at Wplus9

For my card I used the Whole Lotta' Happy, Borders & Backgrounds 3, and the die-cuts
Happy Trio.

1. First, I created a card from white cardstock, and cut a panel same size as my A2 card then stamped the balloons first.
2.  Then when the image is dry I added the confetti effect on my balloons using the Uni-ball Signo board White pen. 
3. Next, I stamped the stamp images from Borders & Backgrounds 3 , I also cut some of the little piece of the stamps to spread the image everywhere on my card panel. Never fear, I can put all the pieces back together and still use it as intended too.
4. Then, I splatter my card with Heidi Swapp Color Shine in Gold...for the trends, I also added some sequins from Pretty Pink Posh.


I got the inspiration from this photo :)

(source)


5. I want to show you I how I did my "happy" die-cut from Happy Trio. I die-cut some coaster board pieces and cut the bottom or the tails of the p's and y,  I did this so the tail of the p's and y are hanging on the strip without cutting some foam dots.


6. For the gold strip here's what I did, I attached my 1/4 score tape on a cardstock and apply my Perfect Pearls in Sunflower Sparkle for the bright gold effect like the Delicata ink....so in love with this color.
7. I then cut and adhere with foam dots on my card panel.


In this picture is just to show you the "happy"  the tails of the p and y just hanging okay on the strip.
The other sentiment is from the Whole Lotta' Happy as well.
I really love that Dawn included the sentiment " From all of US" so...Awesome!!!


Here's the full view of  the card.


I hope you enjoyed some of the trends in this card.

You can check all the details of the challenge HERE.

Thank you so much for visiting
and
Have a VERY Happy Happy Friday :)

.....................................Wplus9 Supplies..................................

Thursday, February 20, 2014

Neat & Tangled Release Previews Day 4 - Diamonds


Hello Everyone....today is the last day previews at Neat & Tangled.
Diamonds

For my first card....
1. First I created a card from cardstock, then cut smaller panel than the A2 card and stamped the Neat & Tangled Diamond image. I then distress the whole panel with Ranger Distress inks.
2. Next I die-cut an oval shape at the center where I will put my sentiment "Thanks" using the Neat & Tangled Stop and Go set.

3. As for my oval panel, I water colored it first using watercolors from Michaels brand and let it dry. Once its dry then I stamped my sentiment in black.

4. Then adhere the oval panel inside the front of the card.


For my second card.... I used the positive oval that I die-cut from the first card, then layer it and adhere it using foam dots.

As for my sentiment I used the stamp set from the Stop & Go set, I just embossed with white embossing powder on a black cardstock and I am done. I have created 2 cards using 1 panel of image :)


I hope you guys enjoyed all the projects this release week!
Thank you so much being so supportive of me this past few days during this release.

Thank you so much for all your sweet comments <3

Remember this set will be.......
 Available for purchase today February 20th at 8am EST.

Just click HERE.

Thank you so much for visiting me!
Have a Fabulous day  <3


Wednesday, February 19, 2014

CAS(E) this Sletch #65


Hello... CAS(E) this Sketch lovers....
Isn't this sketch made by Sam Simpson Amazing? There are just so many possibilities with this one :)


For my card the stamps I used are from Winnie & Walter Scenery: Big Bang Confetti and
Mama Elephant Up and Away.

1. First, I created my card from a cardstock, then adhere the MME paper on top of my A2 card.
2. Then I cut a panel just a tad smaller than my A2 card and stamp all the circles and stars images from W&W.  I really love this stamp set :)

3. I then stamped all my images on a separate cardstock then colored and fussy cut all the images and adhere on my card with foam dots for dimensions.

4. Lastly, I stamped my sentiment from the same set from ME.


Here's the full view of the card.


I hope you guys enjoyed my card :)
Don't forget to join us this week for creative fun :)
CAS(E) this Sketch

Thank you so much for visiting me <3
Have a Fabulous almost Weekend kinda day!

Neat & Tangled Release Previews Day 3 - Stop & Go


Hello Everyone....Its the 3rd day previews at Neat & Tangled.
STOP and GO
If you love On the Corner you will definitely love this.....ubber COOL set designed by: Miriam Prantner

For my first card I flipped the stop light and added flowers as my focal point.
Here's how I did it....

1. First, I made a card from white cardstock, then cut a white panel the same size as my A2 card.
2. I then distress the whole panel with Ranger distress ink Wild Honey & Peacock Feathers.
3. Next, I then die-cut my big cloud shape on the side using a 1 inch circle die then just die-cut it to your liking for a cloud shape.

4. I then stamped, colored, and fussy cut my images, then adhere it with foam dots. As for the sentiments I used the Stop and Go sentiments that are included in the set. I just stamped it on the separate cardstock then cut and adhere with foam dots.


I just want to share with you how I created my own flowers and leaves. I just drew 5 circles on my cardstock using my copics and color with the same color RV21 as for the center I used the R32 and the leaves YG95.  This is just really simple and you can try it with different colors. I just fussy cut each one does not take very long, instant flowers when you need it.


5. At the bottom of my card I just cut a strip of white cardstock and color it with grey to make it look like a the pavement *-*  I also added a strip of kraft cardstock and adhere it at the bottom of the grey.


Here's the full view of the entire card.


For this card...I think this will be perfect for a male card...no flowers here...Ha! I just love flowers <3

1. First, I created a card base from a kraft cardstock and created my white panel a little bit smaller than my A2 card, then distressed it with Ranger distress ink Peacock Feathers just very lightly.
2. Next I die-cut the black cardstock using the two dies from Mama Elephant Landscape Trio...hehe that is why my road has a shape :) Oh.....and I just used my ruler to write my white dash line using White Gelly Roll pen I got at Michaels over at the pens and marker section of the store.

3. I then stamped, colored, and fussy cut each image then adhere with foam dots.


4. For the sentiment, I stamped it on the white strip of cardstock and adhere with foam dots.


Here's the full card.


I hope you guys enjoyed this new stamp set from Neat & Tangled.
Remember this set will be.......
 Available for purchase on February 20th at 8am EST.

Also Don't forget to enter the Neat & Tangled
chance to win this stamp set, just click HERE to get more details.

Thank you so much for your visit :)
Have a Fabulous Day!

Tuesday, February 18, 2014

Neat & Tangled Release Previews Day 2 - On the Corner Additions


Hello Everyone...2nd Day Preview at Neat & Tangled.

This is a  perfect addition stamp set for On the Corner, but can also be used as is  just as perfect.


For my first card this is how I used this FAB stamp set.

1. first I cut a panel from a white cardstock same size as my A2 card then, distress it with Ranger Distress Ink color Peacock Feathers and Peeled Paint then splatter my panel with water and let it dry.

2. I then cut a strip of black cardstock and embossed my sentiment from the same set On the Corner Additions.

3. Next, I die-cut some clouds die from Wplus9 Hearts & Clouds die/ PTI Heart 2 Heart #6 die to use it as a   speech bubble. The clouds sentiments are from the same set, and also distress with Ranger Distress Ink Wild Honey, Peacock Feathers, and Picked Raspberry to add color.

4. I then assembled my pieces and added foam dots for added dimensions :)


Here's the look of the full card.


For my second and last card I used the back of my sentiment stamps to create my flowers and leaves. If you know me, I try to use my stamp sets in other ways than intended to... it prolongs the usage of my stamps :)

This is how I did it......


1. First create my card, then cut different panels for my card.

2.Then fuzzy cut my flowers and leaves after stamping, then stamped my sentiment.

3. I adhere everything with foam dots then I'm done :)


Here's the full view of the card.


I hope you guys enjoyed this new stamp set from Neat & Tangled.
Remember this set will be.......
 Available for purchase on February 20th at 8am EST.

Also Don't forget to enter the Neat & Tangled
chance to win this stamp set, just click HERE to get more details.


Thank you so much for visiting me!
Have an Amazing Day  <3

Runway Inspired Challenge #54


Hello...hello its time for another....


Below are the pieces I used for my card....hope this helps you view it better :)


For the Memory Box Prized Chrysanthemum Outline die-cut, I have to cut five times because of
each of the color of the cardstock, then I just pick the petals and stick it to the outline piece by piece.

Then, I just assemble the elements on my card base adding dimensions on all my pieces.


Here is the full view of my card.


I hope you enjoyed this short post.

Don't forget to join us this two weeks for a chance to win Ellen Hutson GC
Just click......
 Runway Inspired Challenged


Thank you for visiting me.
Have a wonderful day.

Monday, February 17, 2014

Neat & Tangled Release Previews Day 1 - Hope Anchors


Hello Everybody... today I get the honor to introduce to you the new stamp set from Neat & Tangled 
Hope Anchors


I really love this stamp set because its big and bold.

1. First I create my card base from a white cardstock then create a frame on my Fine Linen cardstock using the Mama Elephant Femme Frame. I used the smallest frame on the set and the negative makes a perfect frame, then adhere some foam dots for dimensions.

2. Next, I cut some different color cardstock then cut it slanted and then gather the colors together and stamped the Hope Anchors to create a bold and colorful focal point. I then adhere some foam dots to make it resemblance of frame.


Here's the look of the dimensions :)


The look of the full card.


For my second card I made it just pink.

1. First I stamped my sentiment first on the card base using Versamark ink then heat embossed using White
embossing powder, then distress it with Ranger ink Victorian Velvet.

2. I then used my White embossing powder again this time on the Pink Blush cardstock, then die-cut the heart shape using Wplus9 Clear Cut Stackers - Hearts.

3. To finish of the card I then adhere some foam dots on my heart die-cut then adhere on top of the sentiment making use they align together to get look.


Here's the full card.


For my third and final card I used my pattern papers to add some flowers on my card, to make it more feminine.
1. First I adhere my patterned paper on top of my card base, then cut a strip of wood grain paper paper, and die-cut some scallop from Mama Elephant Landscape Trio from patterned paper and vellum.

2. The flowers you see is from the patterned paper as well, I fussy cut the best way I could and added some
sequins from Pretty Pink Posh to finish off my card.


Here's the full view of the card


I hope you enjoyed this new stamp set from Neat & Tangled.
Remember this set will be Available for purchase on February 20th at 8am EST.

Also Don't forget to enter the Neat & Tangled
chance to win this stamp set, just click HERE to get more details.


Thank you so much for visiting me!
Have an Amazing day :)

Friday, February 14, 2014

Sending Sweet Wishes


Hello...hello this is my first time participating at 
Every Monday Taheerah is having this challenge....have you played yet?
Yummy inspiration photo don't you think?  Who wouldn't love sugar now and then :)


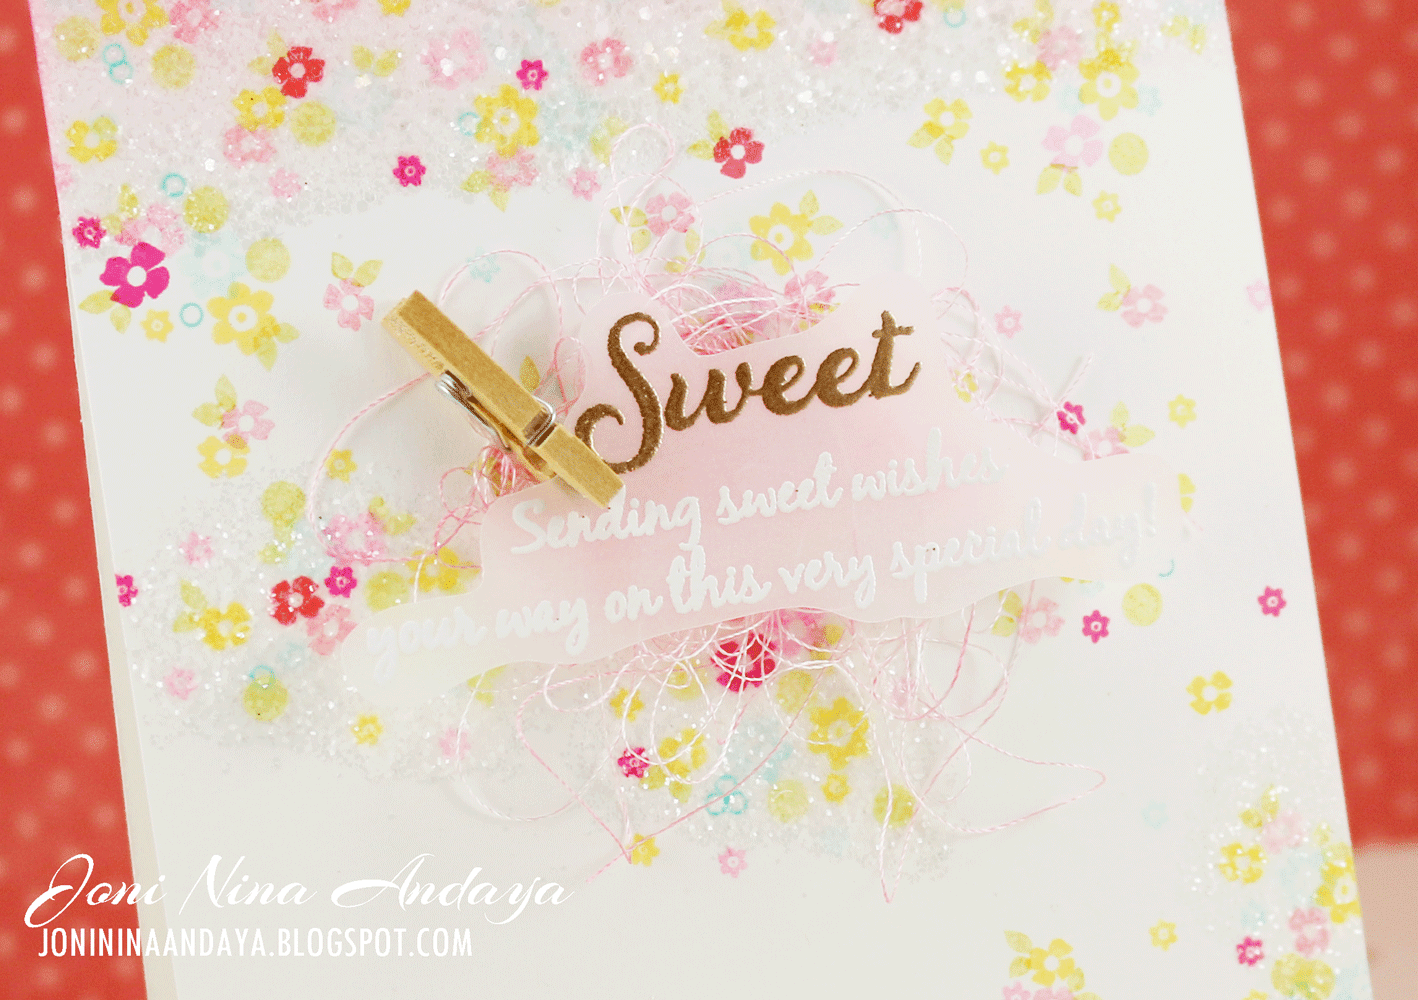
As for my card I first stamped it with flowers then applied versamark and embossed it using sticky embossing powder then added some glitters then heat embossed.
Its like the sugar flowers you put on your cupcakes or cakes..... Love <3

I then embossed my sentiments on the piece of vellum added some pink thread behind and added
the tiny clothes pin to finish off my card.


Here's the full view of the card


I hope you like my take on the challenged.
If you have not tried yet here's the link:
Cure for the Monday Blues 

Thank you so much for visiting me :)
Have Fabulous Weekend.

................................................Supplies...........................................