Thursday, September 26, 2013

CAS(E) this Sketch #47

Happy Thursday Everyone!
Its time for another CAS(E) this Sketch.

This is a sketch of the week!
So many possibilities don't you think?


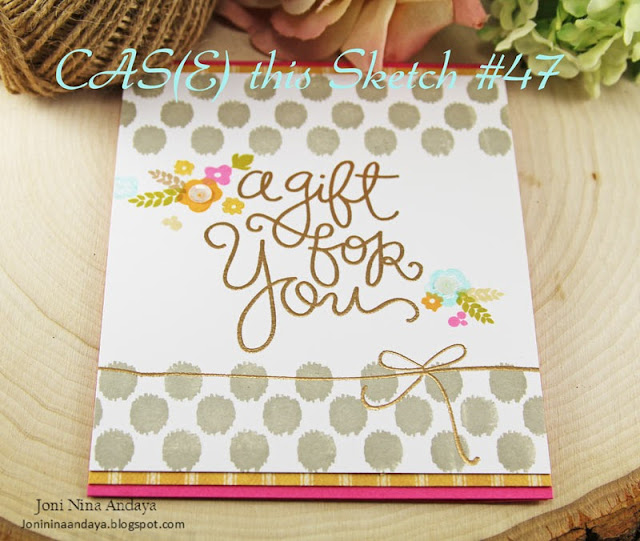
Here is my take on Chrissy's FAB sketch! 
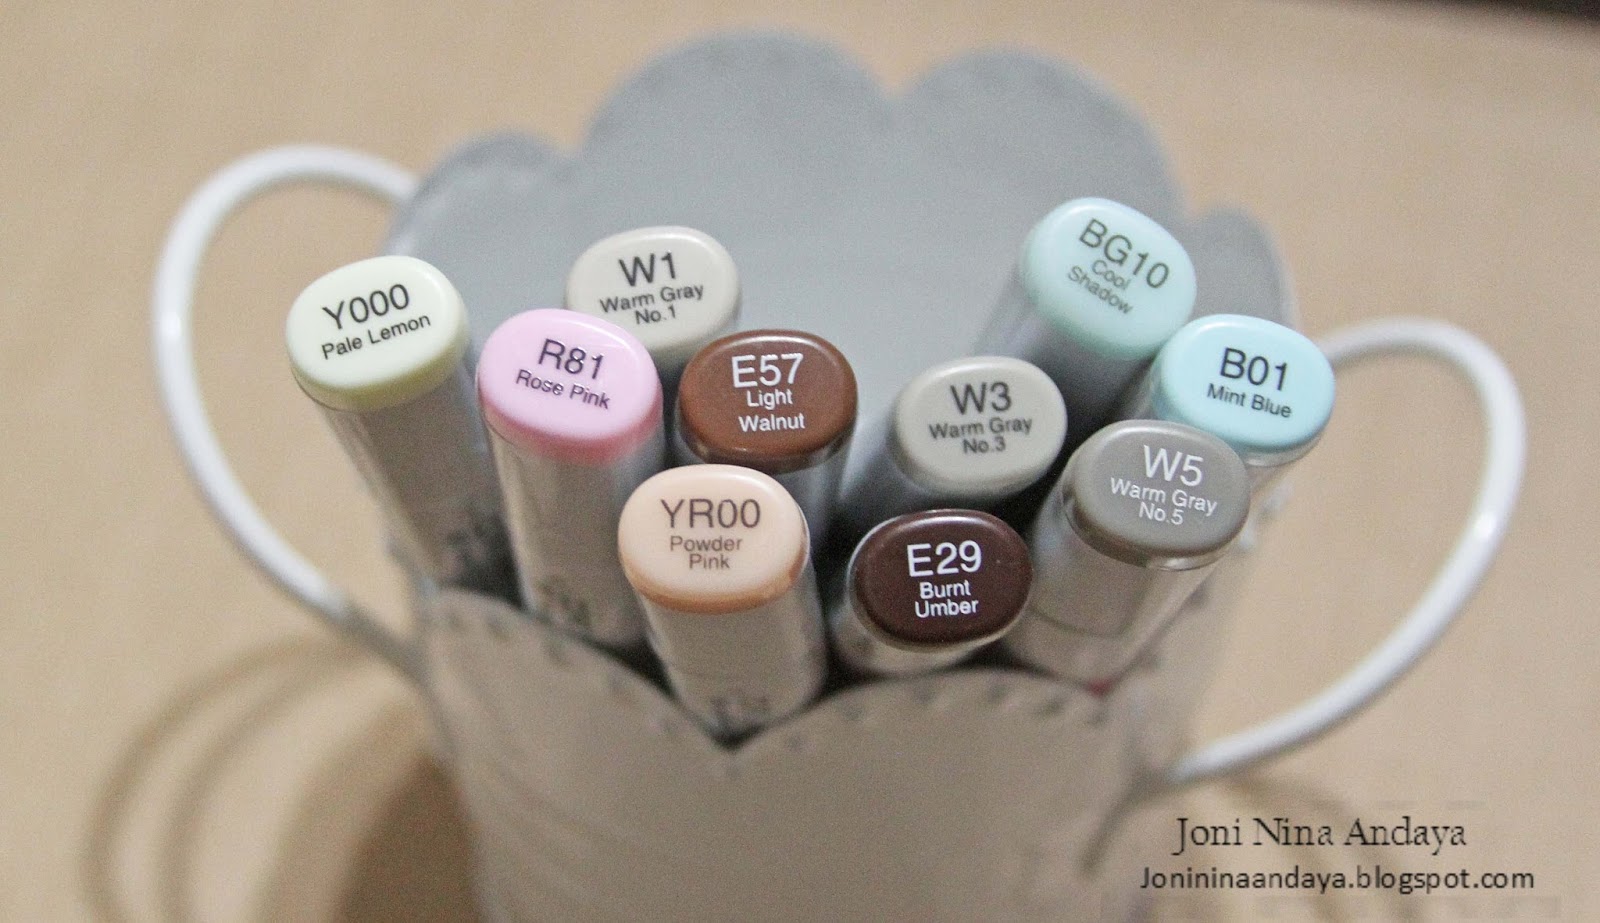
I started my card by stamping one of the background stamps from WPlus9 stamp set Borders and Background1. As for my sentiment I used the stamp set from Simon Says Stamp Envelope Sentiments, I gold embossed it then added some flower images from PTI Mini Blooms, to showcase the pretty sentiment.


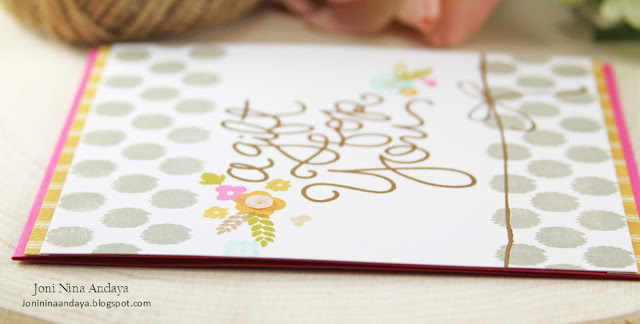
On this card I did not get to use any foam dots I tried to make it a flat card this time.
I only added a very few sequins on my card.


The gold bow and ribbon image is also from the stamp set Envelope Sentiments. I cut the the stamp image with my sharp scissors and stamped it this way instead of stamping the other way. I can always
put it back if I would need to stamped it on the envelope.


Here is  another look of the card :)


I hope you guys enjoyed my take!
Thank you for visiting :)

I cannot wait to see want you make on this FAB sketch...I know it will be amazing!
Oh more great ideas, don't forget to check out the Design Team interpretations.


Have a Marvelous Week!

Wednesday, September 25, 2013

September Blog Hop


Hello Everyone!
Today I am participating at Papertrey Ink September Blog Hop!
Its all about wreath :)


For my card I used the Papertrey Ink Mini Blooms to create my wreath.
I used a text pattern paper for my panel for added interest. 
Then after all the stamping I adhere it on wood grain pattern paper from Crate Paper, to
crate more of a rustic feel :)


For my sentiment I used the Basket of Blessings, so love this sentiment :)
As for my bow I used the image from Happy Hydrangea set. I embossed the bow 
with gold embossing power by Ranger and add a Rhinestones from Studio Calico.


I tried to make it a one layer card as much as a can, but could not help it. I have to add
a foam dots on the bow.


Here's another look.


Thank you so much for looking!
Have a Fabulous day!


Thursday, September 19, 2013

CAS(E) this Sketch #46

Hello Everyone....
For today's CAS(E) this Sketch is from Karolyn Loncon.


Here's what I came up with. 
On my card I used the acorn image from the new Lawn Fawn Into the Woods stamp set.
I created a two friends acorn.
Don't you think they are cute? Hehe..what a happy image indeed :)


Here's the close-up. 
Oh....on my cream card stock panel I used the background stamp from Darcie's Honeycomb
I hope you can see the texture of the white embossing powder :) its really pretty in real life.
I also used the Mat Stack #6 die and stamp set
from PTI where my acorns are glued onto. I didn't use a 
foam dots on the acorns, only under the "My Dear Friend" sentiment to give it a little more emphasis.


The little leaf was part of the Into the Woods stamp sets. I just color it with Copics to add color and 
fuzzy cut it.


Here again is my card.


I hope you enjoyed my take.

For more inspiration please check the CAS(E) this Sketch Design Team for more great interpretations.

Thank you for visiting me!
I hope you get to play with us this week :)


Saturday, September 14, 2013

Just a Note

Hello Everyone!
I made this card for...

I am so enjoying this challenge...I think this is my 3rd time...He..he.he.


I ink my mat with Hawaiian Shores ink by Papertrey Ink and spray mist with Gold Lame by Heidi Swapp
then put my white cardstock on the top of my mat then I used my heat tool to dry.
I then die cut it with Cover Plate Triangle die from Papertrey Ink.

This is like the same background I made HERE.


But the focus on this card is I made my embellishment by embossing some of my 
fabric florals that I bought at Michaels.

Here's how I did it...I ink the tips of my flowers with my Versamark ink.


I then dipped it with my Gold Embossing powder by Ranger and use my heat tool.
Just be careful not to heat too long or the flowers will burn.


And here's the finish Fabric Gold Embossed Flower with a touch of Gold cover plate die background.


Here again is the finish card.


I hope I have inspired you to try.

Just click HERE to go to Moxie Fab World

Thank you for visiting me.
Have a wonderful weekend!


Supplies
Cardstock: Rustic Cream , Simply White Papertrey Ink
Stamp: American Craft Hello There 
Ink: Versamark ink, Hawaiian Shores
Other: Gold Embossing Powder Ranger, Gold Lame Heidi Swapp, Fabric Flowers Michaels

Friday, September 13, 2013

Sending Birthday Hugs & Wishes

Hello Everyone...
I made this card for a friend...so I thought before I give it to her might as well enter it to....
I am so enjoying this challenge so if you have not tried yet.....you should!
Let me tell you these card are so therapeutic to make.


Here's what I did....I ink my mat first then sprayed it with Gold Lame mist and mix.
I then put my white cardstock on top of my ink then dry with a heating tool.
The color it makes after its all dry is so pretty.....don't you think?

1 2

3 4


After all its dried up I then die cut it with Papertrey Ink Cover Plate: Triangles.
I then put the cover plate die on top of my misted watercolor paper.


I then added the feather die using the Fanciful Feathers die by WPlus9.
Add the sentiment from Papertrey Ink Stylish Sentiments: Birthday, and adhere
the Giant Rhine Stones from Glitz: Hello Friend.


Here's the finish card!


I hope I have inspired you to try if you have not yet!

Just click HERE to go to Moxie Fab World

Have a FABULOUS Weekend!!!
Thank you for visiting me.

Thursday, September 12, 2013

CAS(E) this Sketch #45


Hello Everyone, I hope you guys are having a fantastic day today.
 Its time for
CAS(E) this Sketch #45.

Today we have a sketch made by N@ Ali's, isn't Amazing? So many possibilities!


To begin... I created  a winter scene for this sketch. 

You see I am starting to make some early non-traditional holiday cards to give out to friends and families. 
Since I am always excited in the change of seasons. So what a better way to get an early start now.

On my card I used the stamps from Papertrey Ink Hills collection by Nichole Heady.

 Can you tell I am....so longing to have a cool weather here soon :) its just too hot here in Jacksonville. 
Our electric bill is getting too expensive every month. 
I hope the weather in your neck of the woods is as fair as can be.


Here is how I did the card....
On my card panel I made an outline for my ground first using the ruler and pencil
since I can never get a straight line without my ruler. After making my line I then stamped my 
tree images from the Hills collection stamp sets. 

The houses are also from that set. I just colored and fuzzy cut them.
I just highlighted the ground with copics W1, W3, and W5. I then added the Diamond Stickles 
on the trees, ground, and that pretty much finishes the card.

I Just let the stickles dry first before adhering the houses :)

  
Here are the Copic colors I used for my houses and ground. The ink pad I used for the trees is the
Hero Arts Soft Sand Shadow Ink. 


I hope you can see how wintery this feel from the glitz of the tree.
That diamond stickles really did its job.

If you can see the top of the roof I also added some Liquid Pearls White Opal from Ranger  then add
the diamond stickles, but I think it will do without. 
Hehe..he.. its just me, I wanted the snowy look. 


 On the top of my pink house I also added the liquid pearl first and then added the stickles to give that
glitz of snow on the roof feel.


For the sentiments on my card I used the stamp set from Winter Hills "Winter Wishes"
and for the "Enjoy your day"  I used the stamp set from Mini Bloom stamp sets.

Here's how it looks when the glitters on the card hit the light...so pretty!


Here is the front view of my wintery card. 
I hope you guys like it   :)


 Hope you guys get a chance to play with us this week.
I cannot wait to see what you make.

If you need more inspiration, please check out these ladies fabulous interpretation.


Have an AMAZING day!
Thank you for taking some time to visit me.

Joni


..........Supplies........

                      
                          Spring Hills Stamp Set
                               Summer Hills                                                  Winter Hills                                                Spring Hills      
Mini Bloom


The All That Glitters is Gold Challenge


Hello.....
There's a special challenge going on at Moxie Fab World its 
who wouldn't love all that glitter and gold?

So I am trying it out.
Here's what I came up with.


I didn't have a big stamp image that will enhance the gold so I just created my own.
I created my own chevron image on my white cardstock.

12

3  4

After I embossed with gold embossing powder by Ranger.
I then color the rest of the chevron.


After embossing and coloring I then adhere it on the card with foam dots.
I then now created my sentiment card belt. The sentiment I used was from the PTI 
Mums the word.


Next I adhere some of the My Minds Eye enamel dots.
I also added some gems from Studio Calico.


Here is the whole card.


If you have not tried the gold and glitter challenge, you should try!
If you have not check it out or want more inspiration click,
The link to the Moxie Fab The All That Glitters is Gold Challenge
just click 

I hope you guys enjoyed my quick post!
Have a wonderful day!!!
Joni