Tuesday, December 30, 2014

Happy New Year!!!


Hello There, I just want to greet you guys a 
VERY HAPPY NEW YEAR!!!

I know how we love confetti, for this post I will show you how to create your own using the things you might already have in hand.


To begin my project, I first die-cut the rounded rectangled piece using the Clear Cut Stackers: Rounded Rectangles. Then stamped the sentiment "Happy New Year" from Twenty Fifteen  stamp set and added the flowers from Pretty Little Peonies stamp set.


I bought some tissue paper on the party store, you can get the shimmery kind too if you like :)

Next, I cut the strips of tissue paper first on my Tonic paper cutter for fast cutting. I simply stacked some pieces of tissue paper since they are very thin and cut. Next, I bunch the strips on my hand and cut, just make sure you have a box or some container to catch all your paper goodness.


To finish off I put the cut confetti on a clear cellophane bag that I got at my local crafts store. I created a bow from twine, scored the stamped rectangled panel, and clipped the clothes pin on top.


I hope you guys enjoyed!


Have a BLESSED NEW YEAR from my family to yours :)


Tuesday, December 23, 2014

Sending Joy

Hello Everyone, I have a last minute tag and card for today using the new released Wplus9 Winter Pals stamp set and Winter Pals Companion dies, Hand Lettered Holiday Stamp set, Everyday Alpha Stamp set, and Dockside Backgrounds stamp set. Really in love with this new critters from Wplus9.

To begin I first folded my strip of cardstock, then die-cut it using the Timeless Tag 2 die (I used largest of the three). I did this to create a folded tag where I can add my "To and From" sentiment.


Next, I added the "To and From" sentiment inside of the tag using the Everyday Alpha Stamp set.


Next, I stamped the tag using the wood grain background image from Dockside Backgrounds stamp set and stamping it with Gold Delicata ink for gold effect. Then I die-cut the "joy" from Hand Lettered Holiday dies,  I die-cut four times to make the cut thicker. I then distress the bottom of the die-cut to get the two tone look and added some diamond Stickles for a glittered look.

Next, I added the colored and die-cut images from Winter Pals Stamp set, Winter Pals Companion dies, and adhere on the tag.


Next I created my matching card using some of the same products, sentiment die Hand Lettered Holiday, Holiday Apertures die, and Dockside Backgrounds stamp set.

I then die-cut the A2 card panel with Holiday Apertures die to create a window card. I then stamped the window using the Dockside Backgrounds and stamped it with Delicata Ink to get the gold wood grain look. Instead of using a clear covering for my window I used a vellum instead to get the silhouette look of the other sequins I adhere behind the vellum.

I also used the same technique with the "joy" sentiment die and adhere on the top of the window then added some more Lemon Meringue sequins from Pretty Pink Posh to finish off the card.


I hope you can the other sequins from behind the window panel :) very slightly.


Here are the look of both of the projects.


I hope you guys enjoyed!


Thank you so much for stopping by :)
HAVE  A WONDERFUL HOLIDAY from our FAMILY to YOURS <3


Friday, December 12, 2014

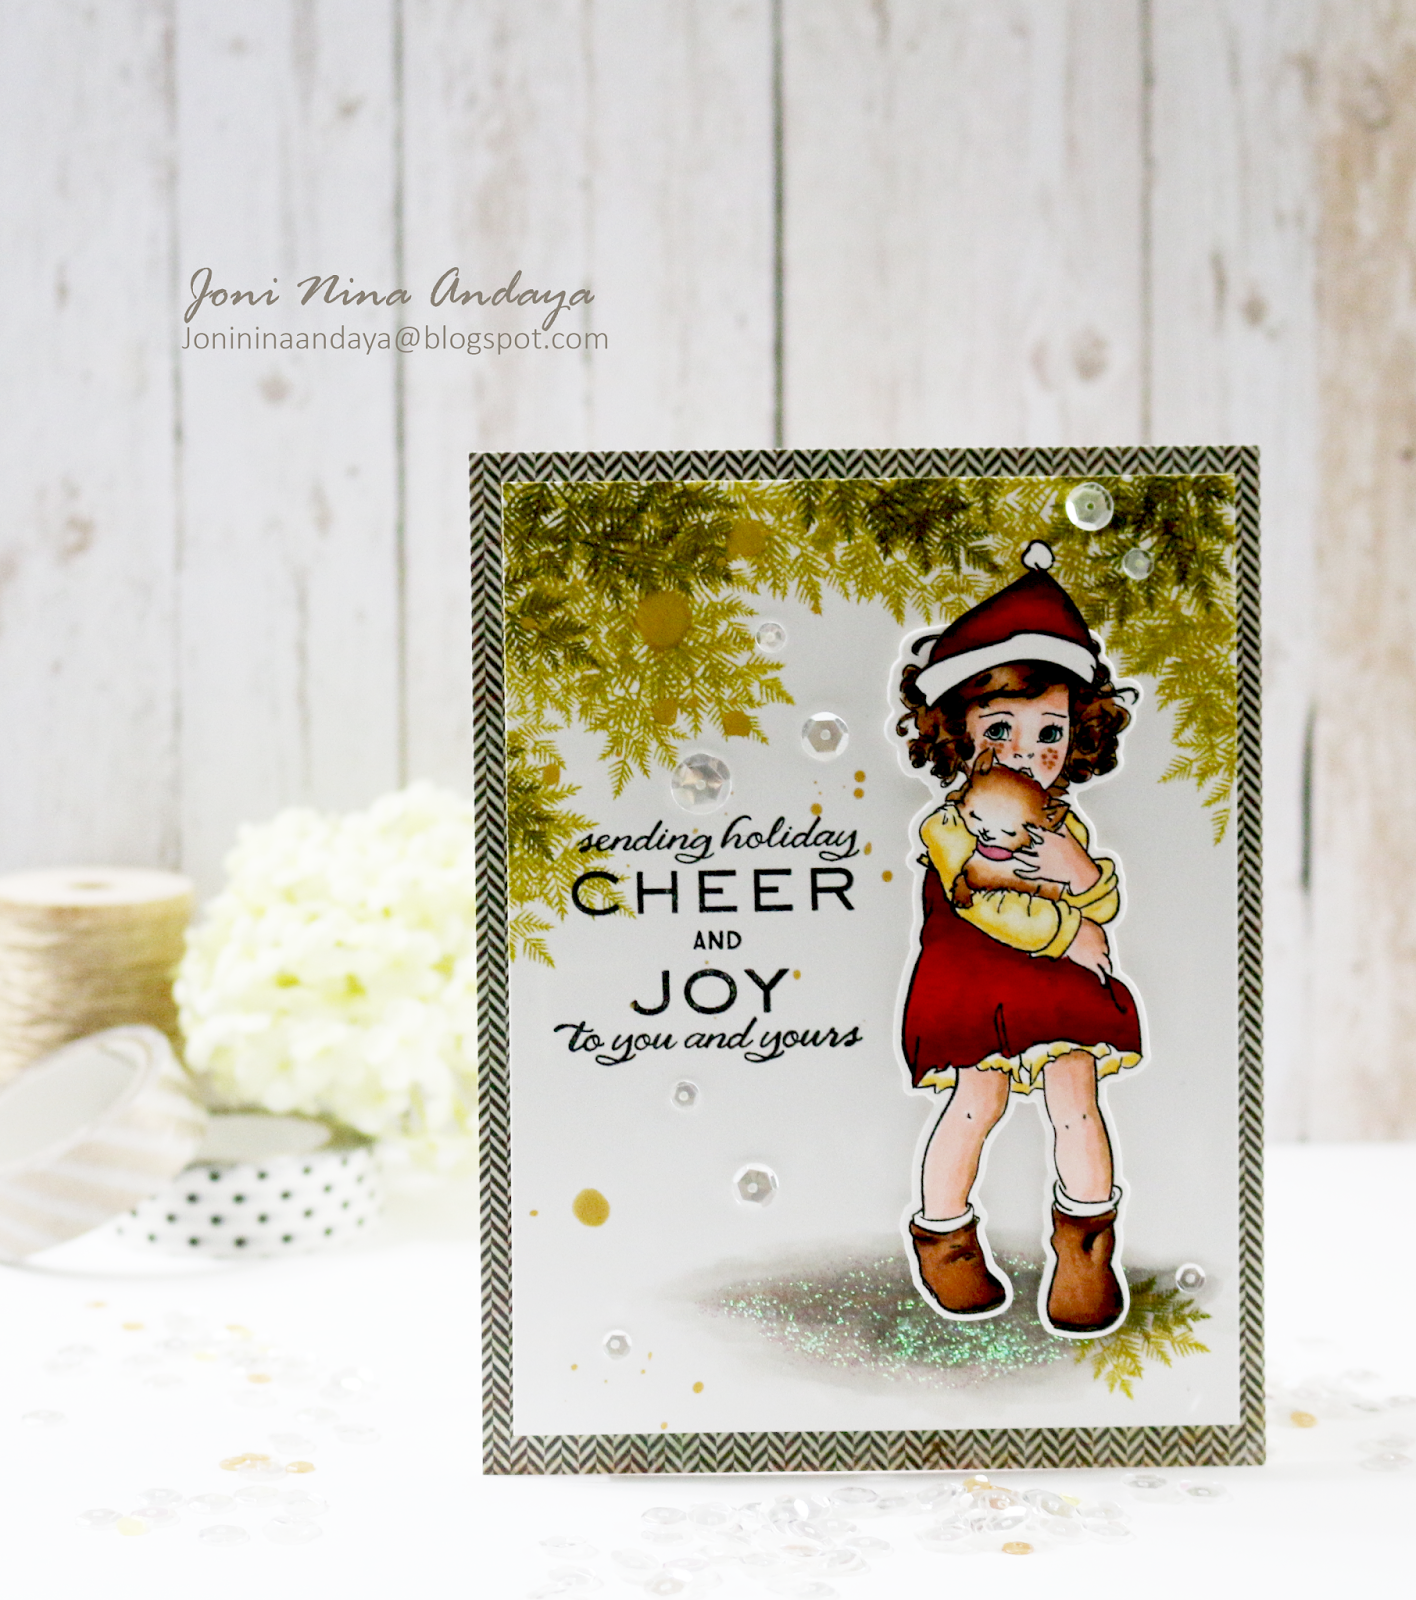
Cheer & Joy


Hello Everyone, just want to share this card I made using the new Wplus9 December 2014 Released Miss You Lots stamp and coordinating die set turned into a Holiday card.

To begin my card, I first stamped the Miss You Lots stamp image and colored with Copics, I also added some freckles on her cheers, then die-cut. I then stamped the elf image from Merriest Wishes stamp set, then colored just the hat and fussy cut to adhere on the Miss You Lots girl's hair.


For the card panel to go with Miss You Lots girl image for the holiday theme, I stamped the fern from Silver Bells stamp set on top of the panel with two different colored inks. Next, stamped the sentiments "sending holiday Cheer" & "Joy to you and yours" from Silver Bells stamp set. But the "AND" sentiment is from Sparkle & Shine stamp set I masked the sentiment "Go Forth AND Shine" leaving just the "AND" to use on the panel.

Next, I added some grey Copic coloring on the bottom of the panel for the ground, and later then added some diamond Stickles for shine and sparkle.


Finally, I added some Heidi Swapp Color Shine in Gold and Pretty Pink Posh in Sparkling Clear sequins in 4mm, 6mm, and 8mm.


Here's the full view of the card.


I hope you guys enjoyed this another alternative for Miss You Lots stamp set :)


Thank you so much for stopping by!
Have a FABULOUS Weekend!!!


Monday, December 8, 2014

Reverse Confetti December 2014 Blog Hop!

Hello Everyone!!!
Welcome to the Reverse Confetti December 2014 Blog Hop!
The hop started over on the Reverse Confetti blog, and you should have made it here from Heather  Pulvirenti's Blog. 


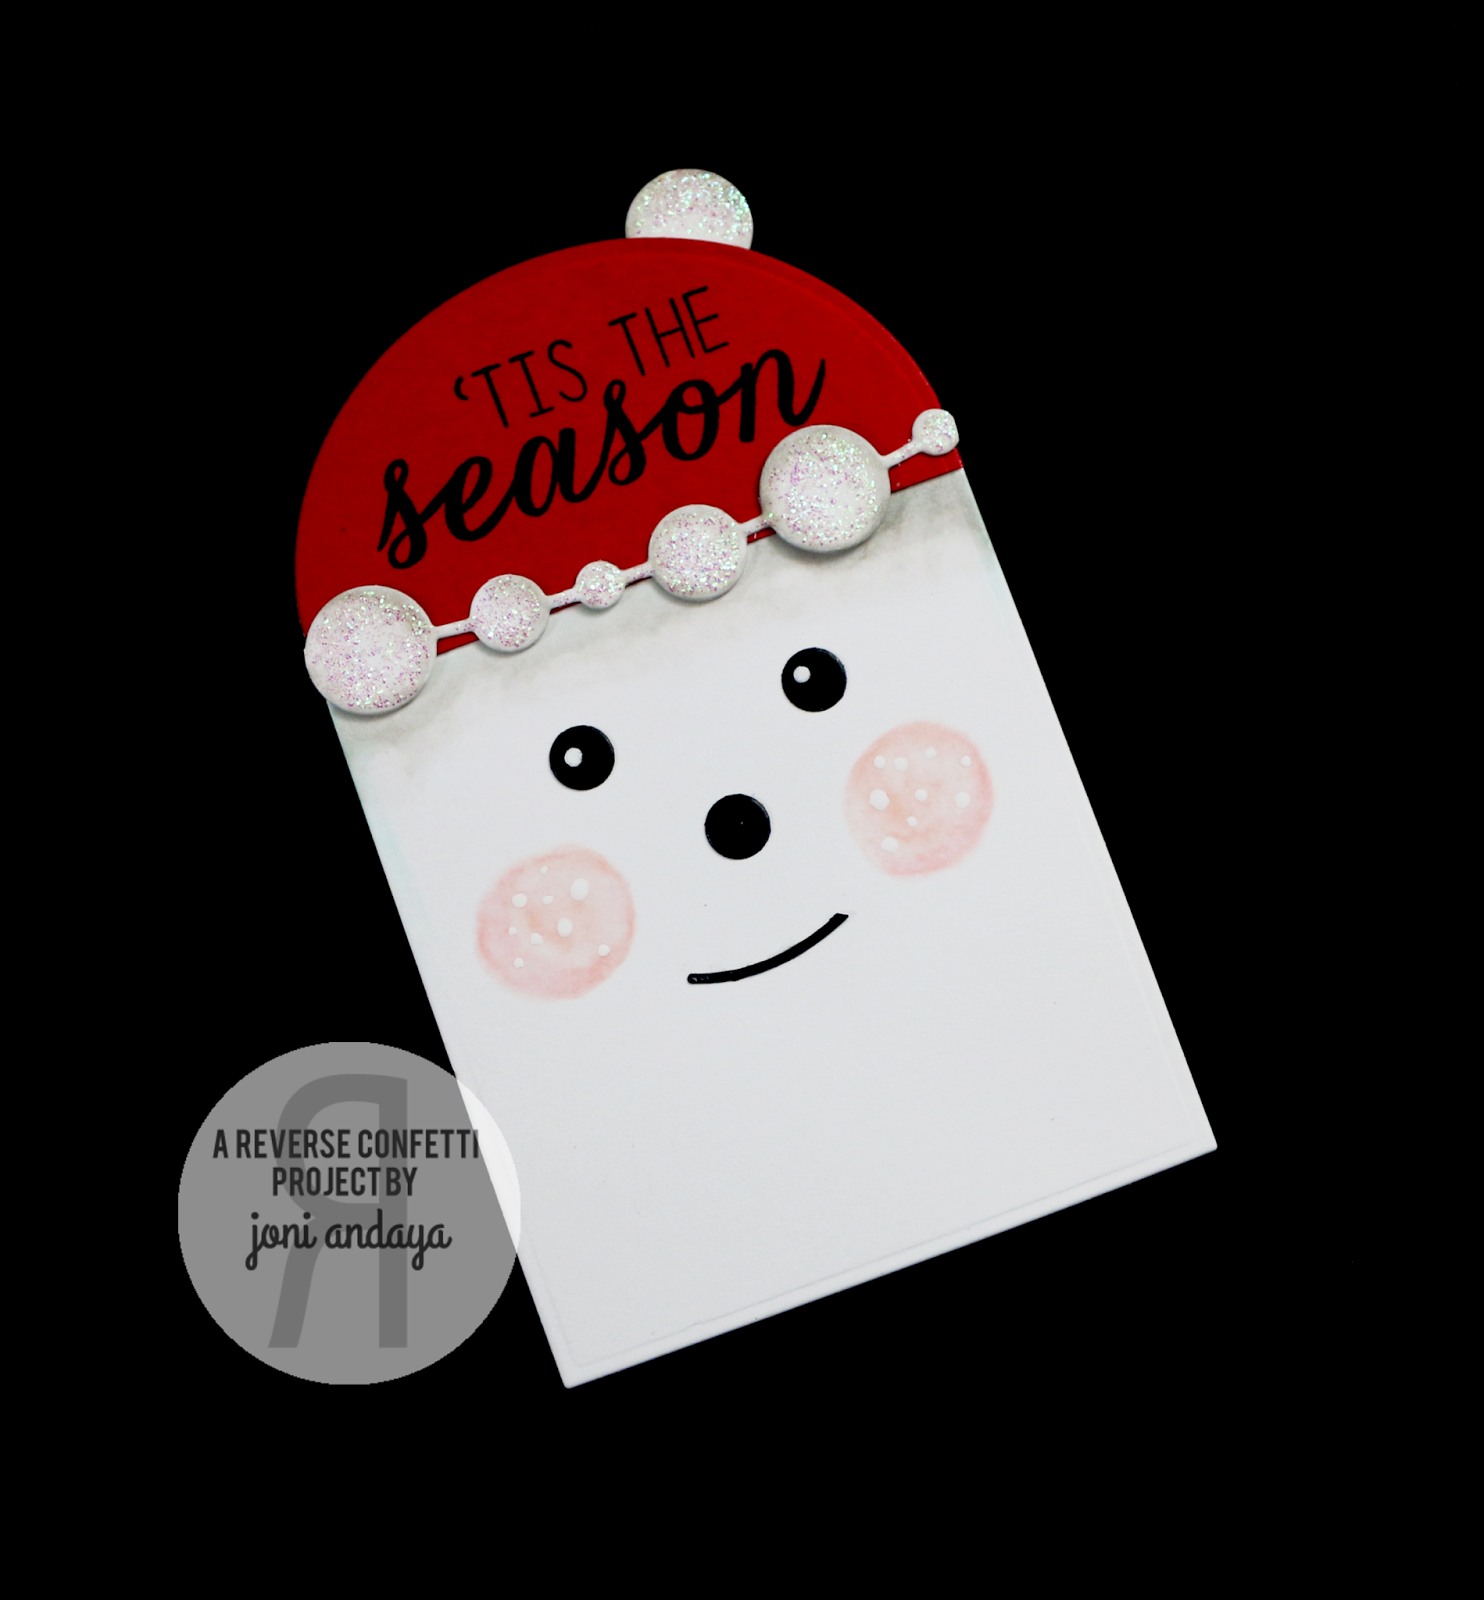
For my project today I used the Seasonal Sentiments stamp set, Circle Garland Confetti Cuts. and Tagged Tote Confetti Cuts.


To begin my goodie bag I first die-cut the tote from Tagged Tote Confetti Cuts using patterned paper from Pink Paislee.


Next, I created the decorations for the tote using the die-cut tag, tiny tag hole reinforcer for the eyes and nose, I die-cut another tag using red cardstock for the hat, for the lips I used the strip from the bow die-cut that is also included from the tagged tote die. For the rosy cheeks added some Copic coloring, For the trim for the hat I used the Circle Garland Confetti Cuts and added some Stickles for sparkle. Finally, I added the "Tis the Season" sentiment from the Seasonal Sentiments stamp set.

I also added some white dots on the eyes and cheeks using the white Uni-Ball broad pen.


Here's the full view


I hope you have enjoyed hopping with us today. Be sure and hop with us on the 8th of EVERY MONTH for more REVERSE CONFETTI inspiration! 

Now it’s time to hop on over to Lisa Henke's blog. If you get lost along the way, you can find the hop order and list of all the participating designers over on the Reverse Confetti blog.

For Giveaway please stop by at Reverse Confetti blog.


Thank you so much for stopping by!
HAVE A WONDERFUL DAY HOPPIN'


Friday, December 5, 2014

Wplus9 - 2014 December Release!


Hello Everyone, Welcome back on the 2014 Wplus9 December Release.
Remember all the new products are now available for purchase in the Wplus9 Store.


To begin my card I stamped, colored the fox from Winter Pals stamp set on the cardstock first, then drew the slope on her background using Copic markers in grey. For shine I added some diamond Stickles on the scarf and on the ground to make it look like a shimmering snow, really love the shines it gives when it hits the light.


Next, I stamped the balloons from A Whole Lotta' Happy stamp set, I stamped the heart balloon first then masked it, then stamped the green balloon, then masked the green balloon then stamped the yellow balloon. I usually use the post it for masking my images, but you can also buy the masking sheets from Simon Says Stamps if you prefer that instead.

Next, I distressed the outer sides of the card panel using Distress ink in Evergreen Bough, then splatter it with some water, then added some dots using Uni - Ball white gel pen, and then added some dots using the diamond stickles for shine.


Next, I die-cut the frame from the Holiday Apertures dies to create a house for my foxy card panel. 
Then white heat embossed the sentiment "Sending Warm Birthday Wishes" on a Black cardstock and adhere with foam tape on the side of the frame.


Here's the full card image.


I hope you guys enjoyed!


For more product inspiration please visit
Dawn and Maureen


Thank you so much for stopping by.
Have a WONDERFUL Weekend!!!


Thursday, December 4, 2014

Wplus9 - December Day 4 Previews


Hello There, Welcome back on our Day 4 2014 Wplus9 December Release Previews.

Dawn is releasing another installment of the Punny Produce.
PUNNY PRODUCE: PEACH


To begin my card I first adhere a strip of patterned paper on the front of the card base and splatter the card base with Mister Huey's Color Mists in Shine. Next, I die-cut the watercolor paper using the tag stitched die from Pretty Pink Posh Stitched Duo 1 Dies

I then white heat embossed the peach image and watercolor it. I added some watercolor splatter on the tag as well. The sentiment is from the same set. I also used the stitched scallop die from Stitched Border 1 Dies. I die-cut it from Kraft cardstock and adhere on top of the tag die. Next, I cut a strip of black cardstock folded it and adhere on top of the tag for a faux ribbon look. To finish off the card I added some Pretty Pink Posh sequins in Lemon Meringue and Sparkling Clear sequins.


For my next card I used the new upcoming
UNCONDITIONALLY


To begin my card, I first created my card base measures 3 3/4 x 6 3/4 inches. Then cut the patterned paper a little smaller than the card base then adhere. Next, I splatter the panel with Heidi Swapp Color Shine in Gold. Next, I cut the paper straw measures 4 1/4 of an inch and adhere the feather die-cut that I distressed from Dreamcatcher die. I also free cut an arrow using the glittered cardstock and bind both ends with Natural Twine from May Arts and adhere on the card. Then, I die-cut the heart from a white and Kraft cardstock using the Clear Cut Stackers: Heart dies. I finished it by stamping the sentiment "Head Over Heals" from the Unconditionally stamp set and added some Metallic Gold sequins from Pretty Pink Posh.


I hope you guys enjoyed.

For more inspiration of the December 2014
upcoming release please visit...

Dawn, Maureen, and Kara


Thank you so much for stopping by!
Have a Wonderful Week!!!


Wednesday, December 3, 2014

Wplus9 - December Day 3 Preview - Miss You Lots

For PC&S Blog Hop Please click HERE.
.......................................................................................................................................................


Welcome back to the Day 3 Preview of Wplus9 2014 December Released.
Today I am showcasing the hand draw image that Dawn created.

MISS YOU LOTS

MISS YOU LOTS 
Coordinating die cut


To begin my card I first stamped the clouds from Wplus9 Heartfelt Mix stamp set on a watercolor paper for background sky I hope you can see it the picture :). I then started watercoloring the bottom of the watercolor panel by tracing the slope with a pencil first then follow it with a tiny watercolor brush and erase the pencil mark. I then used the same technique Dawn use to create the bushes from the Coming Up Roses stamp set by first coloring the baby's breath image stamp with Distress Marker then stamping it on the watercolor paper and watercoloring it. You can see the video here


The pink flowers on the bushes is from the small baby's breath on the Coming Up Roses stamp set as well. The girl is colored with Copics and die-cut using the coordinating die for the image. The sentiment "Hey There" is from the Heartfelt Mix and the sentiment "I miss you a lot" is from the Miss You Lots stamp set.


Here's the full image.


For this second card, to begin I first stamped the birch tree on the watercolor paper from Wplus9 Winter Woodlands stamp set then stamped the baby's breath from Coming Up Roses stamp set. Same technique applied on the leaves on the trees, after coloring the stamp with Distress Marker, stamped it on the watercolor paper, then watercolor the baby's breath images. I also use the smaller version of the baby's breath and stamped it all over the tree leaves for flowers. The sentiment "Love You Unconditionally" is from the new up coming release Unconditionally stamp set.


The little girl and the kitty image is colored with Copics but her dress is paper pieced using the old My Mind's Eye patterned paper.

Here's the full image.


I hope you guys enjoyed!
She really is a pleasure to color.

For more inspiration on the upcoming release please visit.


Thank you so much for stopping by!
Have a Wonderful Week


Paper Crafts & Scrapbooking Magazine Special Thanks! Blog Hop!


You should have arrived from Kathy Martin's Blog.


Hello Everyone, with a heavy heart sharing the news of PC&S leaving us is unfathomable. As I look back, my love for card making all started when I picked up the very first Paper Craft Magazine in my local bookstore back in the year 2011. I saw many amazing cards from talented designers that gave me a chance to try for myself to create too. From this magazine is where I learned which products to use, styles, and different techniques that we evoke to our own way. I cannot believe this is really happening, for all the inspiration gathered and shared for the love of this craft, this will be forever remembered!

For my project I used the new to be released on Dec, 5th 2014 Miss You Lots stamp set. I did this background by stamping the Distress ink pad on the heat mat and spritzing it with water then smooshing the watercolor paper to get the effect, I did the colors on the background one at a time once the first color is dried (Peacock Feather), then followed by (Wild Honey), and (Peeled Paint).  The very first technique I learned upon discovering the love for card making. I let it dry and splattered it with Heidi Swapp color shine in Gold. Once it completely dried I then adhere it on the card with foam square. I added the colored image from Miss You Lots and Pretty Peonies stamp sets. The sentiment is from the Wplus9 Hand Lettered Thanks stamp set.


Here's the full image of the card.


I hope you enjoyed! Thank you so much for stopping by!!! Paper Crafts & Scrapbooking will be thoroughly missed.


Your next stop is at Debbie Marcinkiewicz blog. 


............................................................................................................................................................

Tuesday, December 2, 2014

Wplus9 - December Day 2 Preview - Sparkle & Shine


Hello Everyone, today make the Day 2 of Wplus9 December 2014 Release Preview.
Who doesn't love sparkle and shine?

SPARKLE & SHINE
stamp set


 SPARKLE & SHINE TRIO
die set


For my first project I created a shaker card I die-cut the front panel and then dry embossed it. Then you it as a guide to draw a pencil mark inside my card to where to put my sentiment. Then I covered it with a clear cardstock and put all the stamped cut images including the sequins from Pretty Pink Posh. I then I die-cut the sentiment "shine" in gold and adhere in front of the clear cardstock for more shine.


Here's the full image of the card.


For my second project, I created a tag for my card. Same concept applies above, except its in much smaller scale. I then die-cut the sentiment "sparkle" and adhere on top of the clear cardstock.


Here's the full image.


I hope you day sparkle and shine with this release.


For more inspiration...
Dawn,  Kara & Maureen


Thank you so much for stopping by!
Have a Wonderful Day!

Monday, December 1, 2014

Wplus9 - December Day 1 Preview - Winter Pals


Hello Everyone,
Welcome to Day 1 December 2014 Release Previews, remember all new products will be available for purchase on December 5th, 2014.


For this Day 1 Previews I am using the new upcoming Adorable...
WINTER PALS


Winter Pals Coordinating Die-Cuts


To begin my card, first stamped the tree image to create my winter scene background. Then I adhere the slope I die-cut using the Wplus9 Landscape Border dies and adhere some Martha Stewart coarse glitter. After stamping the trees I then watercolored each image. Next, I stamped the Fox and the block of ice image colored and die-cut and adhere on the card with foam tape.

Next I stamped the sentiment from the same set except the sentiment "sending" this is from the Hand lettered Holiday stamp set, on top of the card and added some diamond Stickles for added snowy background,


Next, stamped the bear, sleigh, and colored it with Copics. Next, I die-cut them with this coordinating dies, but before adhering with foam tape I also colored the ground with Copics in grey and added more Stickles on the ground.


Its the same process I used for my penguin, also colored the ground with grey Copics and added some Stickles.


Here's the full image of the card.


For my next project I also used the clouds from Heartfelt Mix stamp set and Birthday Basics dies. To begin I first stamped the clouds on a separate cardstock then fussy cut. This clouds have its coordinating die-cut but opt it out this time. I then added the sentiment "Sending warm Birthday Wishes" but before adhering the clouds I first distress  the top portion to create a sun background for the clouds.


Next I stamped, colored, and die-cut my images, then adhere on the card. The blue slope you see on the background is also from the Landscape Border dies that I masked and distress with Distress ink.
The gift die-cut is also colored with copics then I added some natural twine and adhere the knot on penguin as if he is trying to fish the gift out of the water, if there is anything such a thing but I think its really fun this way :).


Here's the full card image.


I hope you guys enjoyed!


For more Wplus9 upcoming December release please check out...


Thank you so much for Stopping By.
Have a WONDERFUL Week.