Friday, January 30, 2015

WinnieWalter - Day Four Release Day!


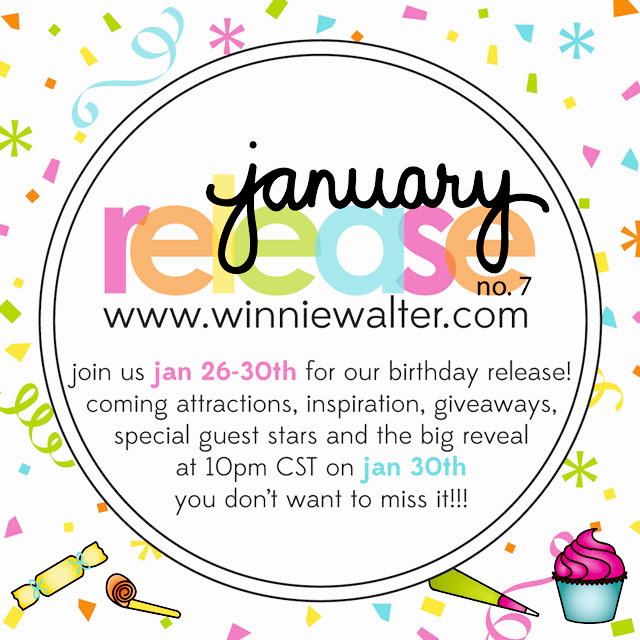
Hello Everyone, welcome come back to the last day release Previews of Winnie & Walter 
1st Birthday Celebration. All the products will be available for purchase today.

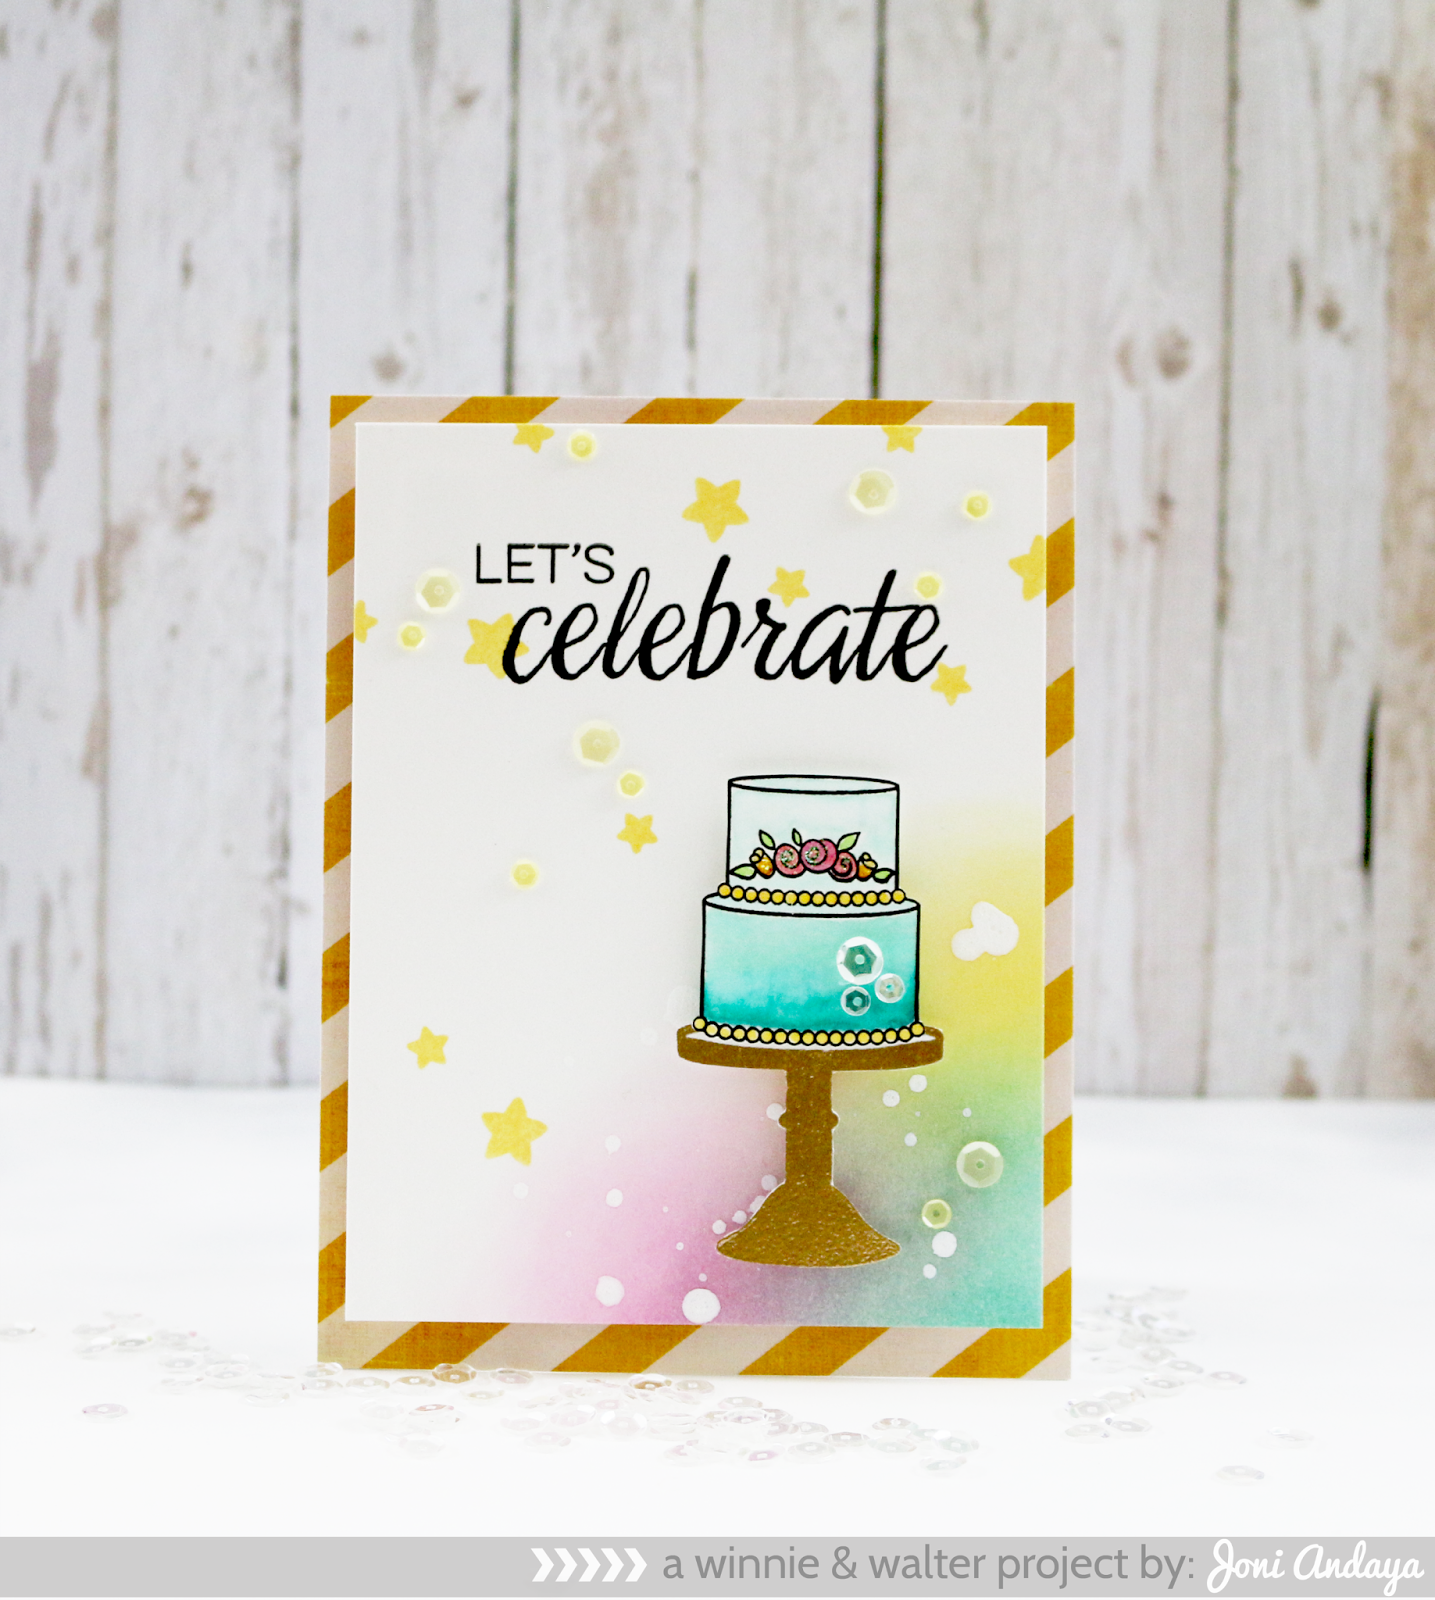
For today I am showcasing The Party stamp set. This set is full load of fun images that you can add to any of your projects.


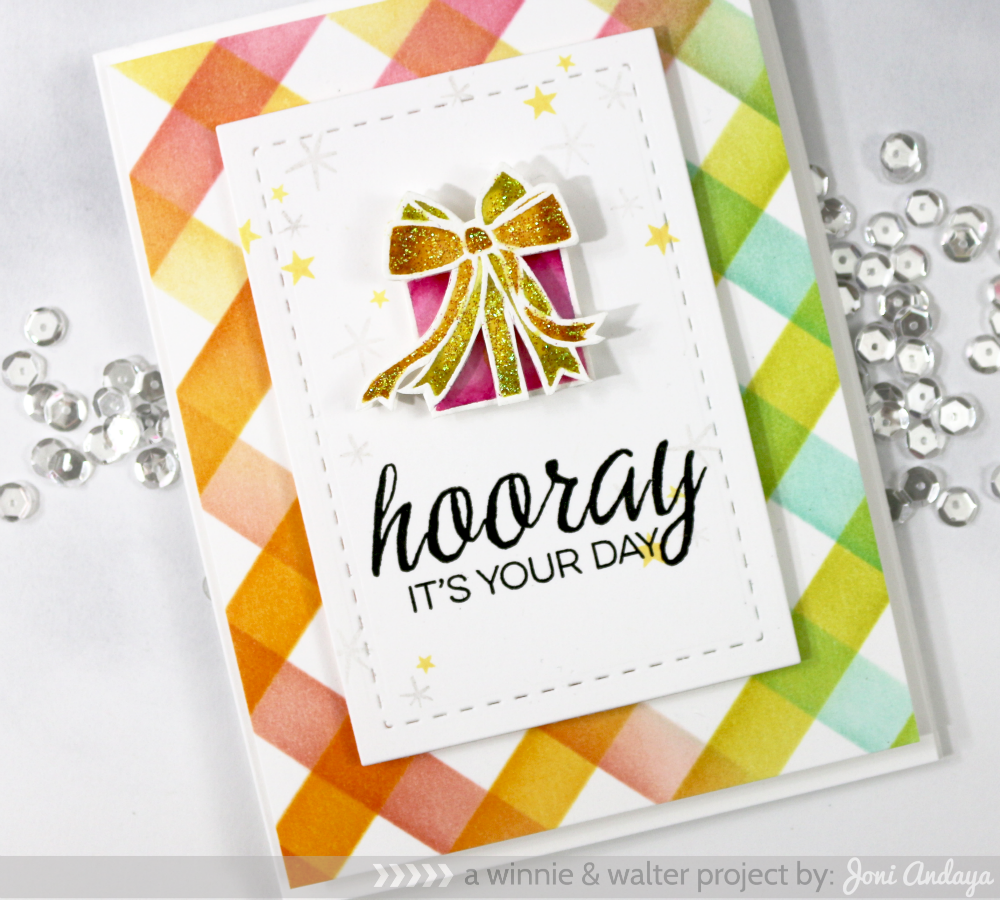
For my first card I used the past released Scenery: Classic Diagonal Creative Screenings and distressed it with different colors of distress ink to create the background look. For the next panel I die-cut the a rectangle stitched from Wplus9 Holiday Apertures dies. The gorgeous gift box with the bow is from The Party stamp set, which I watercolored and fussy cut two times to create dimension on the bow. I also added some diamond stickles on the bow to give that sparkling look.

The sentiment is also from the same set The Party stamp set. The small stars are from the past released Scenery: Big Bang Confetti stamp set.


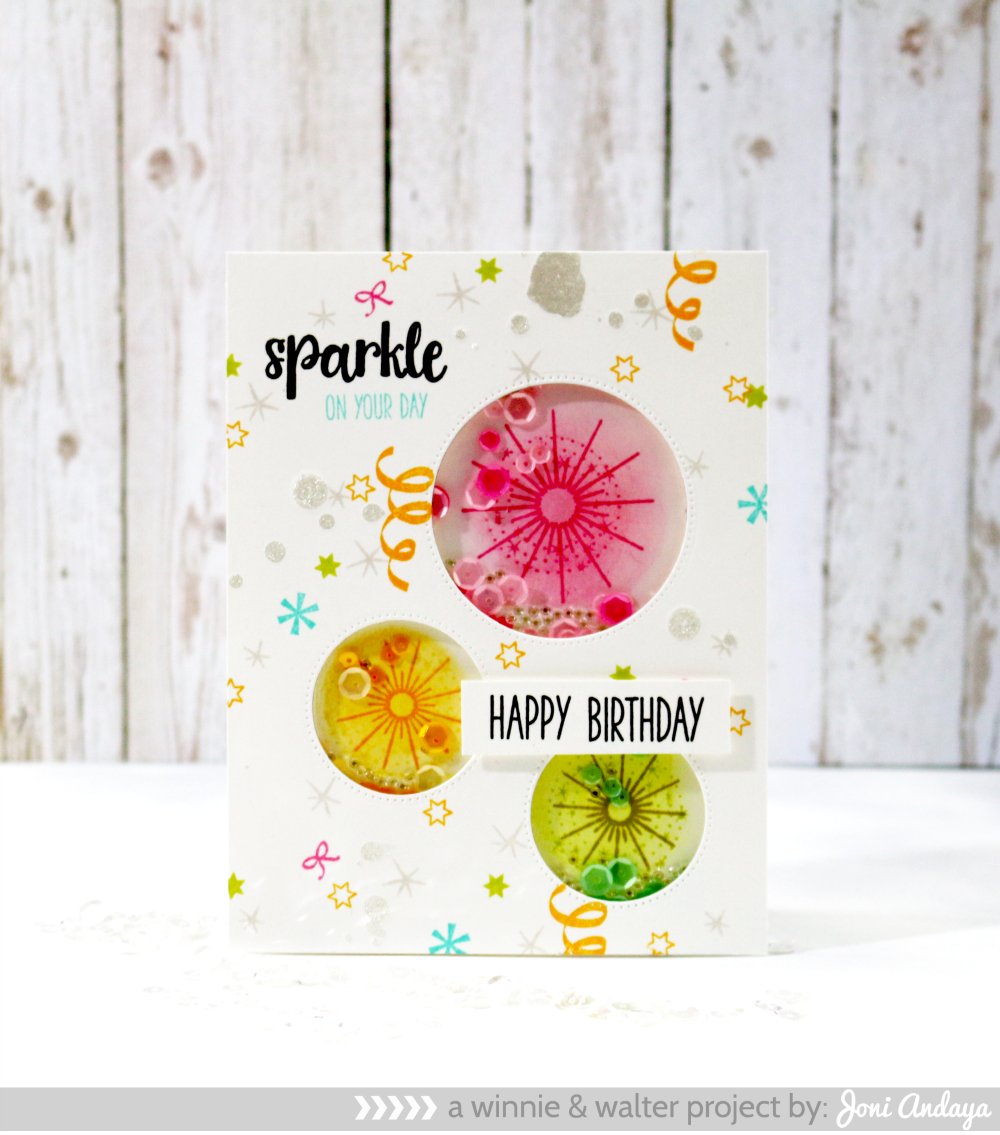
For my second card I added the small images from The Party stamp set on the sparkle shaker card....really fun add ons.  

For the shaker card I first die-cut 3 circles on my card base and used it as a guide where to stamped the cute sparkle stamp set that will be available for free when you purchase it today for $35 or more. Then I added some sequins from Pretty Pink Posh and the seed beads.

The sentiment "sparkle on your day" is from the Sparkle stamp set and the "happy birthday" sentiment is from The Sugar Rush stamp set.


I hope you enjoyed :)
For Inspirations and Giveaways please visit
Winnie & Walter.


Have a Wonderful Week


Thursday, January 29, 2015

WinnieWalter - Day Three Release Previews


Hello...hello so happy its almost the release day, Friday.
I hope you guys like what you see so far at the Winnie & Walter Release Previews.

For today Winnie &Walter are showcasing Sugar Rush and Sparkle stamp set.
The Sparkle stamp set will be available as a free stamp with a qualifying purchase.

Sugar Rush stamp set


Sparkle stamp set


To begin my card I adhered the striped patterned paper on the card base and cut my another panel smaller than the A2 card base. The panel on the bottom right corner is distress with Distress inks and stamped with small puff stars from the Sugar Rush stamp set. I also added some white Studio Calico Spray Mist in white at the bottom of the panel for added touch.


For the two tier cake I added the flowers from the same set and colored the whole cake with copics in aqua color. The cake stand is fussy cut and gold embossed and adhered with the cake. I also added some sequins on the cake from Pretty Pink Posh in Sparkling Clear.

The sentiment is from The Party stamp set which will be showcased tomorrow :)

I hope you enjoyed :)


For Inspirations and Giveaways please visit
Winnie & Walter.


Have a Wonderful Week

Wednesday, January 28, 2015

WinnieWalter - Day Two Release Previews


Hello Everyone, welcome back to Day 2 of the Release Previews from Winnie & Walter. Today we are showcasing all about Stripes you can you can use to add to your project Scenery: Stripes stamp set.


For my first card, I used the tiny stripes for my background and added the watercolored flowers from The Party stamp set that will be reveal on Jan. 30 on Friday. The leaves and the sentiment are from the past released, A Tree For All Seasons stamp set.

For the sentiment was gold embossed, fussy cut then adhere with foam tape, the stripes were ink with Gold Delicata ink pad and added some Pretty Pink Posh sequins in Marshmallow in 4mm and 6mm.


For my second card I used the thick stripes from the bunch and stamped it with different colored inks. The cupcake images are from the Sugar Rush stamp set that will be reveal tomorrow Jan. 29. The sentiment was from The Party stamp set that will be reveal on Jan. 30 Friday.


I hope you enjoyed :)


For Inspirations and Giveaways please visit
Winnie & Walter.


Have a Wonderful Week.


Tuesday, January 27, 2015

WinnieWalter - Day One Release Previews


Hello Everyone, welcome to Day 1 Winnie & Walter January Release 2015!
I hope you guys are just as excited as we do :)

For today I am sharing the font that we all came to love. Another installment of the famous The big and the bold sentiments for this release its all about celebration. The Big, the Bold and Party stamp sets with its Coordinating Cutaways that will be Available for purchase on January 30th.


To begin my card I cut a 6 1/2 by 4 inches card base and distress all sides with Distress ink in Wild Honey and Picked Raspberry. I then cut a white cardstock for the front panel of my card and stamped the images, some I stamped on a separate white cardstock fussy cut then distress. Next, I stamped some of the dot images from Scenery: Big Bang Confetti stamp set. 

For the sentiment "Celebrate" I stamped it on a white cardstock, fussy cut, and adhere on the middle of the card. To finish it off I added some Pretty Pink Posh sequins in Marigold, Sweet Blush, and Pretty Peonies in 4mm/6mm.


I hope you guys enjoyed!

For Inspirations and Giveaways please visit
Winnie & Walter.


Have a Wonderful Week.


Monday, January 26, 2015

Sending Lots of Love...


Hello Everyone, its been so quiet here lately. There's a reason for this, that I will soon share with all of you. Today I wanted to share this watercolor card I made just recently for a friend who lives so far away. Sometimes we create for a just because. 

For my project I used products from Wplus9


To begin I stamped the images one by one using the Distress Marker. I colored the clear stamps and stamped them on the watercolored paper. I added very little water using my watercolor brush as I go along image by image. 

Next, once the image panel was finished I then cut the panel and adhered it on a gold polka dot Kraft patterned paper that I also cut. For added interest I added the tiny bitty paper clip from Tim Holtz, and Pretty Pink Posh Lemon Meringue sequins in 4mm and 6mm.


I hope you enjoyed!

Thank you so much for visiting
Have a Wonderful Week :)


Sunday, January 11, 2015

PPP - You Warm My Heart


Hello Everyone, I am back with more Pretty Pink Posh goodness.
I didn't get to share this card yesterday using the new release Peek-A-Boo die, please let me
 share it with you today.

For this card  I also use the Lawn Fawn Snow Day stamp set and Snow Day lawn cuts.


I first adhered the yellow striped of patterned paper on the white card base. Next I cut the white card stock panel a little smaller than the A2 card and mask the bottom to create the grass look. Next I die-cut the center using the Peek-A-Boo die.

The two bunnies were stamped, colored, and die-cut from the Snow Day stamp set. They are perfect to hold the sides of the Peek-A-Boo die to reveal the heart image that's also been die-cut from the same Snow Day stamp set.

The sentiment and the tiny dots is also from the Snow Day stamp set. I added some Marigold sequins in 6mm and 4mm to finish off this card.


I hope you guys enjoyed!

Thank you so much for stopping by!
Have a WONDERFUL day :)


Saturday, January 10, 2015

Pretty Pink Posh Birthday Celebration!!!


Hello there everyone, it has been a very exciting week for Pretty Pink Posh.
So glad you can join us on the 1st Birthday Celebration.


I hope you are enjoying all the project from the Team Designers and Guest Designers so far. Really exciting with this release, lots of fun possibilities.

To begin my first project I used the January released from Pretty Pink Posh Pocket Border Die as well as the Gold sequins in 10mm and 4mm. I also used the other stamp sets from Wplus9 Banner Love and Basic Banners for the sentiment "Birthday Wishes". The flower stamp images are the one I illustrated for Waffle Flower DT Mix stamp set.


I die-cut the panel for my card using the My Minds Eye Polka Dot foil patterned paper on top and white cardstock for the bottom panel. For the bottom panel I added the banner stamp image from Wplus9 Banner Love and Basic Banners for the sentiment "Birthday Wishes".


I also created a vase using the negative of the Pretty Pink Posh Pocket Border Die . Here's the look below really easy to align it on each side to get the vase die-cut look :). Then I die-cut cut the bottom of the vase.


Here's the close up.


For my second project I used the Pretty Pink Posh Stitched Duo 3 Dies to create a window heart frame shaker tag, which is so fun to make :).  Also used the stamped sets from Mama Elephant Pandamonium and Honey Bunny for the sentiment "Best Friends Forever". I also added the googly eyes 4mm that are now available for purchase at Pretty Pink Posh shop. 

For the shaker element I added the Mint, Sparkling Clear, Marshmallow sequins, and Silver Shimmer Seed Beads


This is how I assembled the window heart frame to make the skaker tag.


Once the window heart tag is finished I distressed it with distress inks. Then die-cut another tag without the window then created my scene. I then added some stamped and fussy cut pandas.

If you have not tried to make a shaker card Paulina have this video HERE for you give it a go if you have not yet.


Here's the close up of the window heart frame shaker tag.


I hope you guys enjoyed the possibilities :)


Don't forget to leave comments along the hop. Paulina is giving away a Big Shot machine, Pretty Pink Posh dies, sequins prize package and much more!
Make sure and check out Pretty Pink Posh blog for a special 
 coupon code, today is the last day to take advantage of the coupon.

For more inspiration for the new products...

.........you are here.......
Joni Andaya


Thank you so much for stopping by!
Have an AWESOME weekend :)


Monday, January 5, 2015

WFC - DT Mix


Hello Everyone, many of you knew that I step down my position as a DT at Waffle Flower Crafts due to family issues. But before that happened, Nina asked us to design something special for the upcoming DT Mix stamp set.  For this wonderful opportunity I designed this simple flowers/leaves images for the set.
I have created a simple but you can do many things with it, like watercolor it, you can color it with Copics really its up to you :). The whole entire DT Mix stamp set if full of possibilities I am sure you will love.


For my first project I created a Mom card. First stamped the flowers and leaves on a white cardstock and colored it with Copics. Next, I fussy cut then adhered on the triangle foil patterned paper from MME and adhere it with white cardstock panel.

Next, I add a ribbon from Maya road and adhered the flower panel on the kraft card base. Then I stamped the sentiment "Saranghaeyo" means I love you and then added the "mom" sentiment from the past released Be My Guest stamp set.


Here's the full image.


To begin my second card I first stamped the flowers & leaves all over the card then colored it with Copics, then used the Copics Colorless Blender to create the faux watercolor effect. Next I added some Stickles for sparkle and shine. Next, I added some dots using the past released Starry Night stamp set.

For the sentiment "Celebrate your special day with style" from Bowtiful stamp set was stamped on the vellum and gold embossed. Then adhered on the panel using the clear foam tape from 3M.  To finish off the card I added some Sand sequins 4mm and 6mm from Pretty Pink Posh.


Here's the full image.


I hope you guys enjoyed :)


For more inspiration...

Waffle Flower Crafts Blog

Katie Gehring
Kim Kesti
May Sukyong Park
                  Joni Andaya......... you are here!
Sabrina Alery
Tessa Wise


Giveaway Alert 
We have a stamp set of choice as a prize for this hop! The random winner will be drawn from comments left on all of our blogs! Enter by 11:59pm Eastern on Thursday, Jan 8. The winner will be announced at Waffle Flower Crafts Blog on Jan 9.
We are also hosting giveaways on Instagram and Facebook, head over there for more prizes!


Thank you so much for stopping by!!!
Have a Wonderful Week :)


Thursday, January 1, 2015

Sending HappyThoughts...


Happy Anniversary to Fusion Card Challenge!

Hello Everyone, I was invited by lovely Katie to join the One Year Anniversary Celebration of Fusion.
For the celebration they have made this wonderful sketch and photo for us to create our designs with.


For my project I used the photo, I really love the chalkboard and gold :)

I first drew a square pencil mark on my watercolor paper and stamped the flowers from Wplus9 Pretty Little Peonies stamp set. After stamping then I watercolored each images, once the images dried then I erased the pencil mark on the panel. I really love gold, I added some splatter of gold mist from Heidi Swapp Color Mists in Gold.

For the chalkboard panel I cut a 2 1/2 X 3 inches of black cardstock and white heat embossed the sentiment "Sending Happy Thoughts" from Strictly Sentiments 2 stamp set, then added some white chalk ink around the sentiment to give that chalkboard feel. To give it a gold border on the panel I swiped the ink pad of Versamark ink on all the corners and dipped each corner on gold embossing powder and used the heat tool to melt the powder for the gold border look.


To finish off the card I adhere the chalkboard panel with foam tape for dimension.


Here's the full view of the card.


I hope you guys enjoyed!
I hope you will join in the festivities at Fusion.


Thank you so much for stopping by.
Happy New Year again to everyone :)