Tuesday, December 30, 2014

Happy New Year!!!


Hello There, I just want to greet you guys a 
VERY HAPPY NEW YEAR!!!

I know how we love confetti, for this post I will show you how to create your own using the things you might already have in hand.


To begin my project, I first die-cut the rounded rectangled piece using the Clear Cut Stackers: Rounded Rectangles. Then stamped the sentiment "Happy New Year" from Twenty Fifteen  stamp set and added the flowers from Pretty Little Peonies stamp set.


I bought some tissue paper on the party store, you can get the shimmery kind too if you like :)

Next, I cut the strips of tissue paper first on my Tonic paper cutter for fast cutting. I simply stacked some pieces of tissue paper since they are very thin and cut. Next, I bunch the strips on my hand and cut, just make sure you have a box or some container to catch all your paper goodness.


To finish off I put the cut confetti on a clear cellophane bag that I got at my local crafts store. I created a bow from twine, scored the stamped rectangled panel, and clipped the clothes pin on top.


I hope you guys enjoyed!


Have a BLESSED NEW YEAR from my family to yours :)


Tuesday, December 23, 2014

Sending Joy

Hello Everyone, I have a last minute tag and card for today using the new released Wplus9 Winter Pals stamp set and Winter Pals Companion dies, Hand Lettered Holiday Stamp set, Everyday Alpha Stamp set, and Dockside Backgrounds stamp set. Really in love with this new critters from Wplus9.

To begin I first folded my strip of cardstock, then die-cut it using the Timeless Tag 2 die (I used largest of the three). I did this to create a folded tag where I can add my "To and From" sentiment.


Next, I added the "To and From" sentiment inside of the tag using the Everyday Alpha Stamp set.


Next, I stamped the tag using the wood grain background image from Dockside Backgrounds stamp set and stamping it with Gold Delicata ink for gold effect. Then I die-cut the "joy" from Hand Lettered Holiday dies,  I die-cut four times to make the cut thicker. I then distress the bottom of the die-cut to get the two tone look and added some diamond Stickles for a glittered look.

Next, I added the colored and die-cut images from Winter Pals Stamp set, Winter Pals Companion dies, and adhere on the tag.


Next I created my matching card using some of the same products, sentiment die Hand Lettered Holiday, Holiday Apertures die, and Dockside Backgrounds stamp set.

I then die-cut the A2 card panel with Holiday Apertures die to create a window card. I then stamped the window using the Dockside Backgrounds and stamped it with Delicata Ink to get the gold wood grain look. Instead of using a clear covering for my window I used a vellum instead to get the silhouette look of the other sequins I adhere behind the vellum.

I also used the same technique with the "joy" sentiment die and adhere on the top of the window then added some more Lemon Meringue sequins from Pretty Pink Posh to finish off the card.


I hope you can the other sequins from behind the window panel :) very slightly.


Here are the look of both of the projects.


I hope you guys enjoyed!


Thank you so much for stopping by :)
HAVE  A WONDERFUL HOLIDAY from our FAMILY to YOURS <3


Friday, December 12, 2014

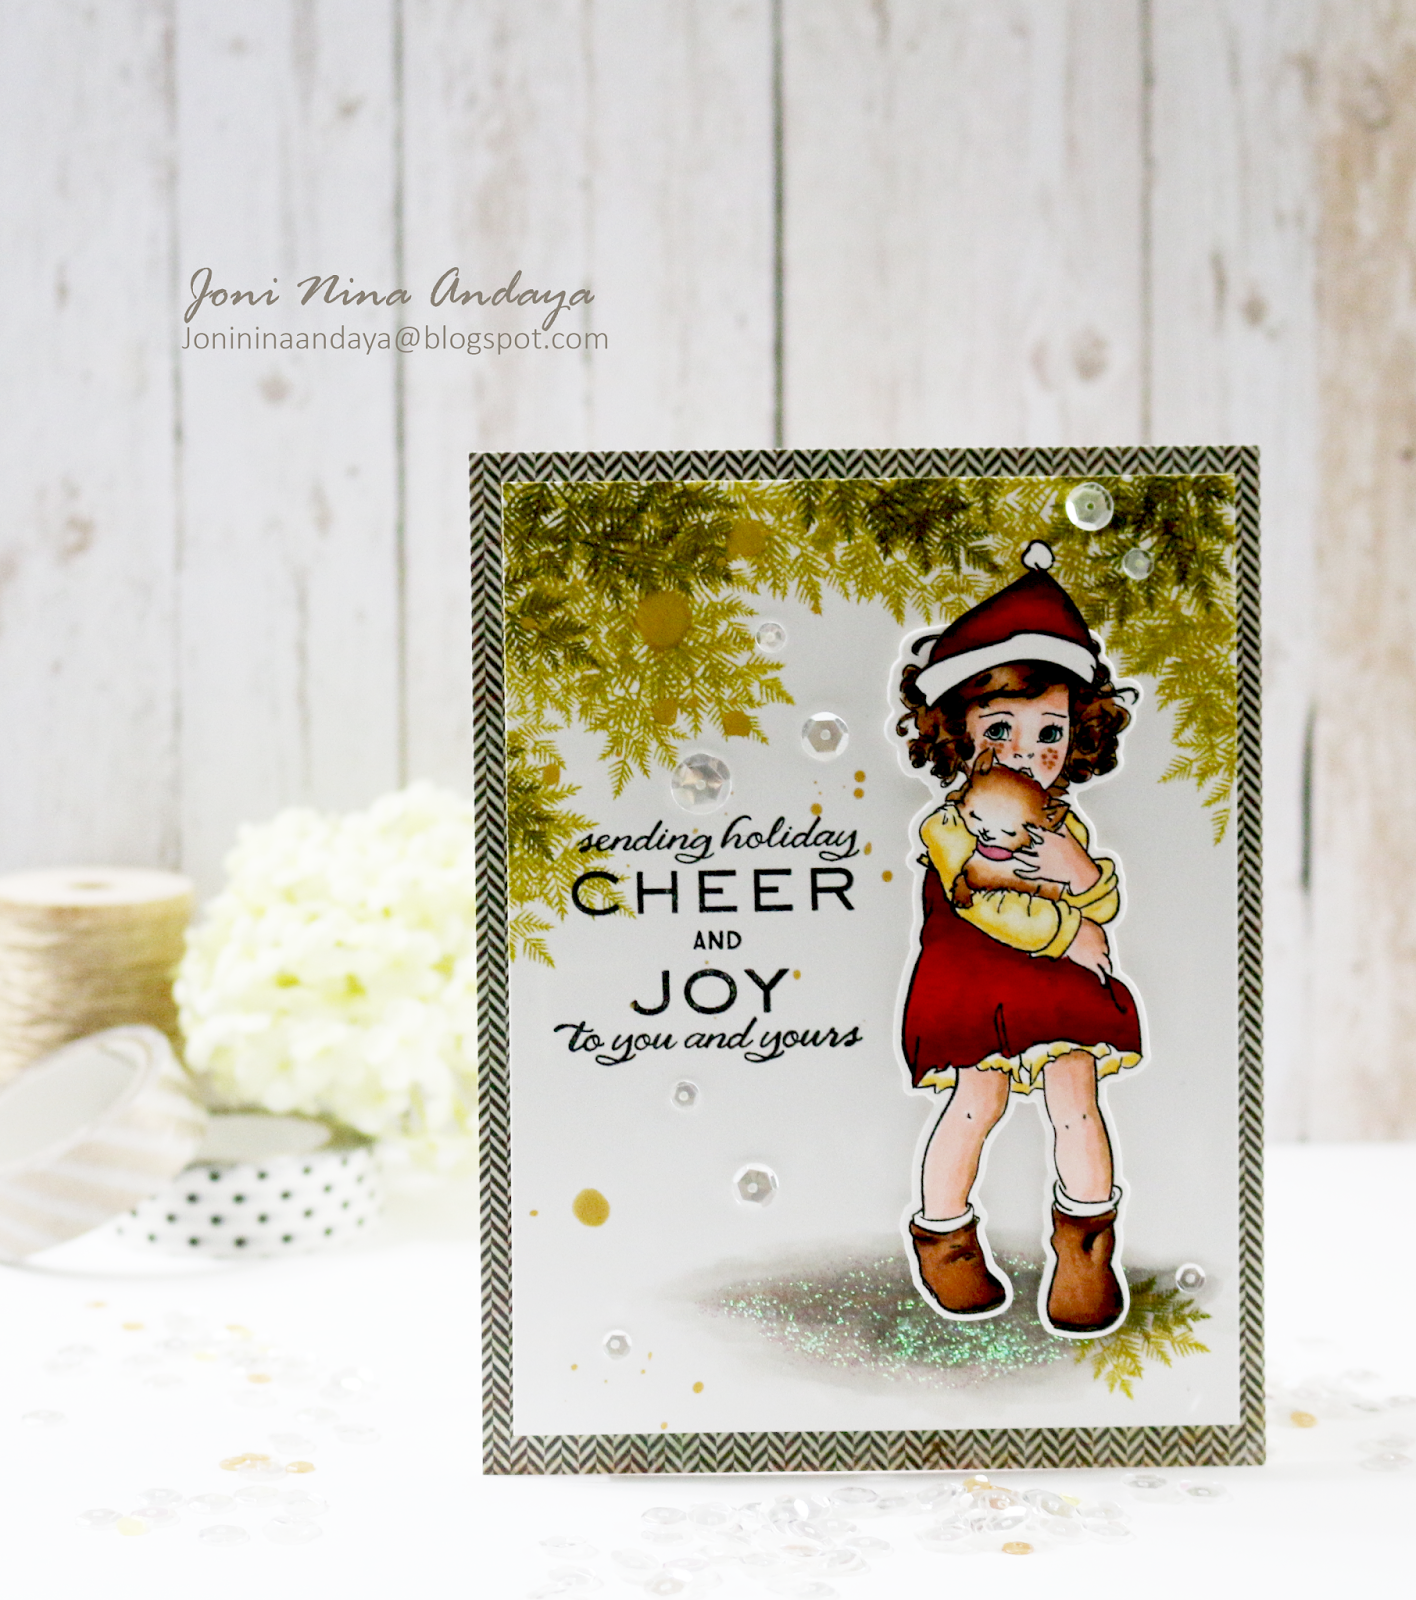
Cheer & Joy


Hello Everyone, just want to share this card I made using the new Wplus9 December 2014 Released Miss You Lots stamp and coordinating die set turned into a Holiday card.

To begin my card, I first stamped the Miss You Lots stamp image and colored with Copics, I also added some freckles on her cheers, then die-cut. I then stamped the elf image from Merriest Wishes stamp set, then colored just the hat and fussy cut to adhere on the Miss You Lots girl's hair.


For the card panel to go with Miss You Lots girl image for the holiday theme, I stamped the fern from Silver Bells stamp set on top of the panel with two different colored inks. Next, stamped the sentiments "sending holiday Cheer" & "Joy to you and yours" from Silver Bells stamp set. But the "AND" sentiment is from Sparkle & Shine stamp set I masked the sentiment "Go Forth AND Shine" leaving just the "AND" to use on the panel.

Next, I added some grey Copic coloring on the bottom of the panel for the ground, and later then added some diamond Stickles for shine and sparkle.


Finally, I added some Heidi Swapp Color Shine in Gold and Pretty Pink Posh in Sparkling Clear sequins in 4mm, 6mm, and 8mm.


Here's the full view of the card.


I hope you guys enjoyed this another alternative for Miss You Lots stamp set :)


Thank you so much for stopping by!
Have a FABULOUS Weekend!!!