Hello Everyone!!!
Welcome to the Reverse Confetti December 2014 Blog Hop!
The hop started over on the Reverse Confetti blog, and you should have made it here from Heather Pulvirenti's Blog.
For my project today I used the Seasonal Sentiments stamp set, Circle Garland Confetti Cuts. and Tagged Tote Confetti Cuts.
Here's the full view
Welcome to the Reverse Confetti December 2014 Blog Hop!
The hop started over on the Reverse Confetti blog, and you should have made it here from Heather Pulvirenti's Blog.
For my project today I used the Seasonal Sentiments stamp set, Circle Garland Confetti Cuts. and Tagged Tote Confetti Cuts.
To begin my goodie bag I first die-cut the tote from Tagged Tote Confetti Cuts using patterned paper from Pink Paislee.
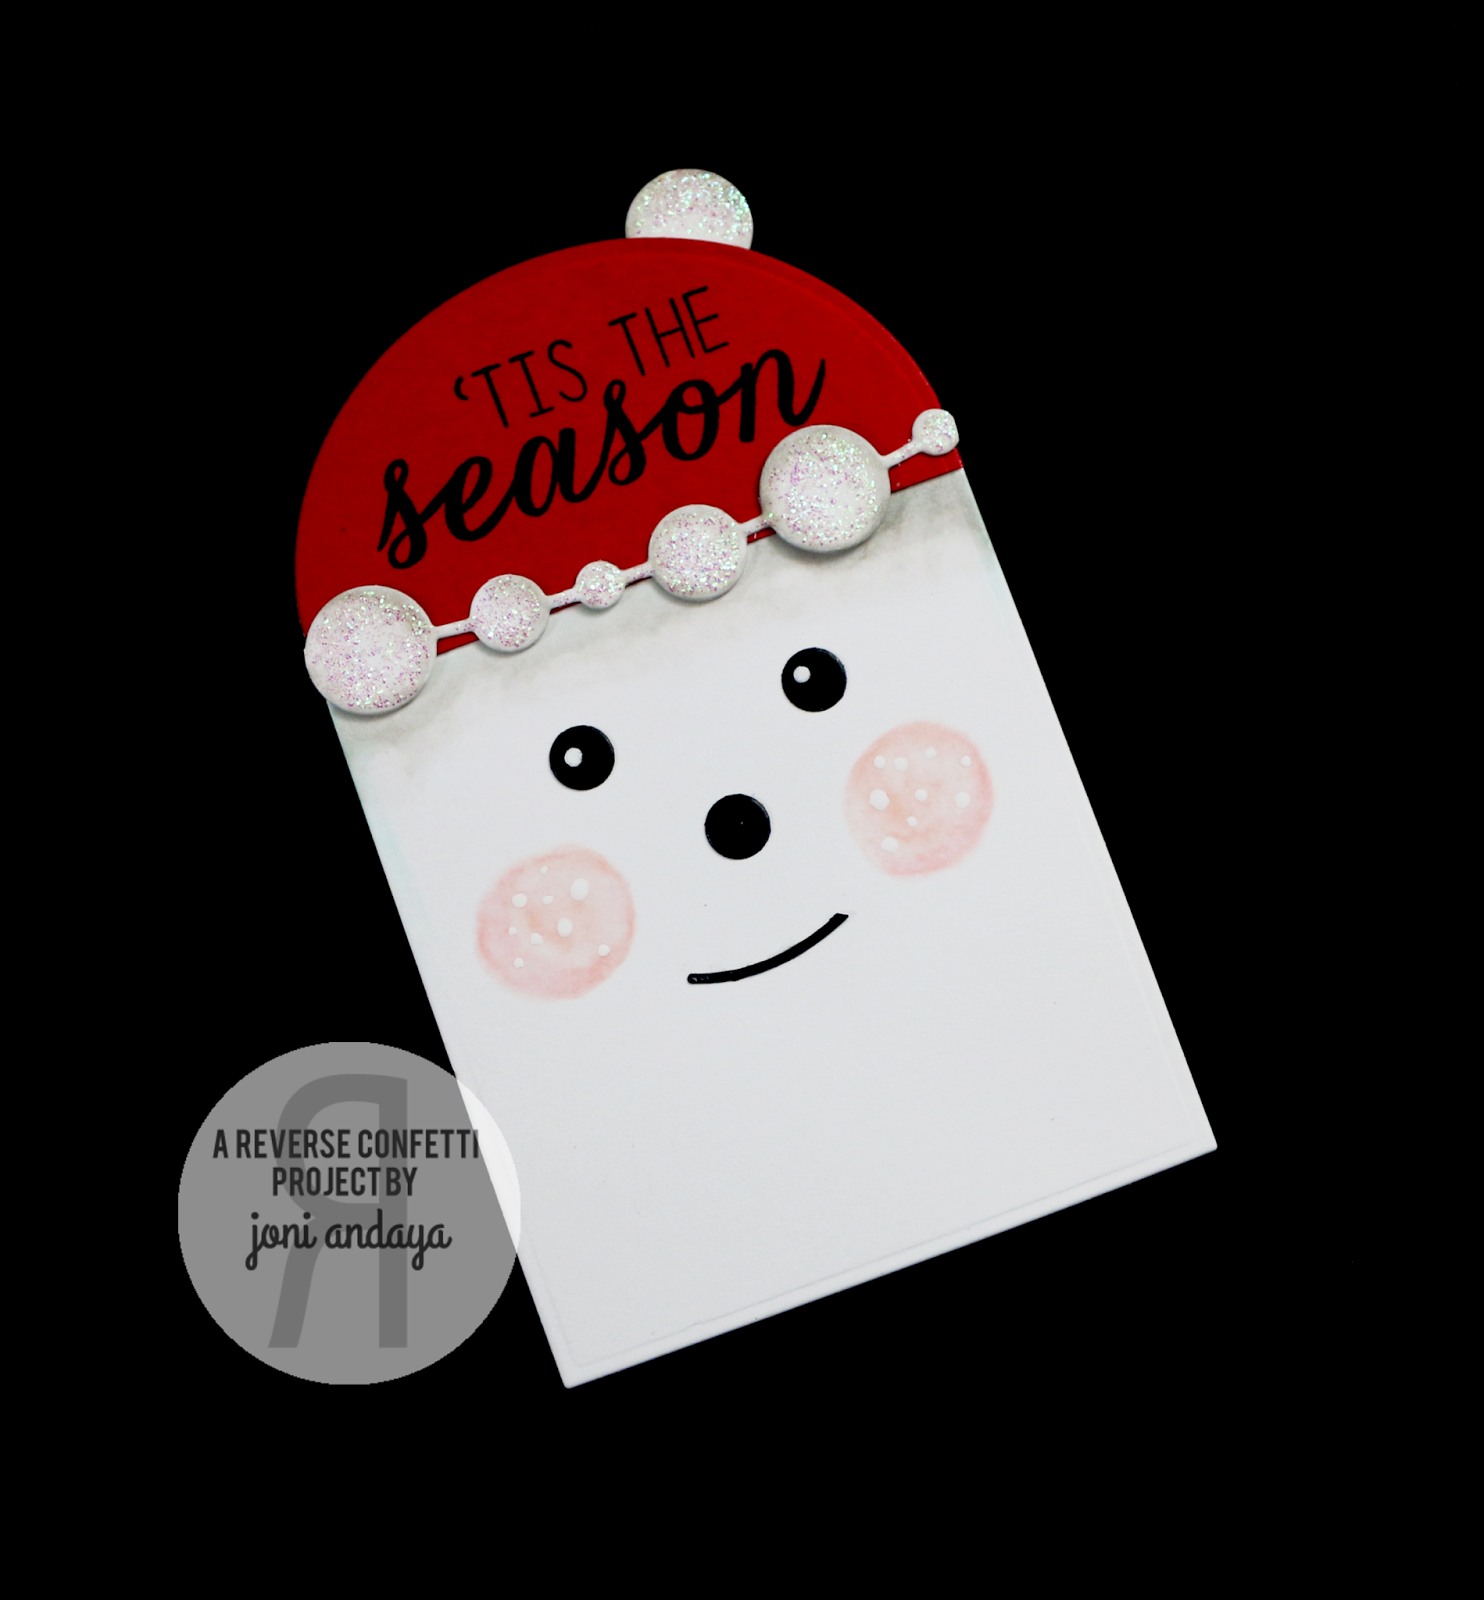
Next, I created the decorations for the tote using the die-cut tag, tiny tag hole reinforcer for the eyes and nose, I die-cut another tag using red cardstock for the hat, for the lips I used the strip from the bow die-cut that is also included from the tagged tote die. For the rosy cheeks added some Copic coloring, For the trim for the hat I used the Circle Garland Confetti Cuts and added some Stickles for sparkle. Finally, I added the "Tis the Season" sentiment from the Seasonal Sentiments stamp set.
Next, I created the decorations for the tote using the die-cut tag, tiny tag hole reinforcer for the eyes and nose, I die-cut another tag using red cardstock for the hat, for the lips I used the strip from the bow die-cut that is also included from the tagged tote die. For the rosy cheeks added some Copic coloring, For the trim for the hat I used the Circle Garland Confetti Cuts and added some Stickles for sparkle. Finally, I added the "Tis the Season" sentiment from the Seasonal Sentiments stamp set.
I also added some white dots on the eyes and cheeks using the white Uni-Ball broad pen.
Here's the full view
I hope you have enjoyed hopping with us today. Be sure and hop with us on the 8th of EVERY MONTH for more REVERSE CONFETTI inspiration!
Now it’s time to hop on over to Lisa Henke's blog. If you get lost along the way, you can find the hop order and list of all the participating designers over on the Reverse Confetti blog.
For Giveaway please stop by at Reverse Confetti blog.
Thank you so much for stopping by!
HAVE A WONDERFUL DAY HOPPIN'
HAVE A WONDERFUL DAY HOPPIN'


adorable!!!!
ReplyDeleteSooooo so sweet! Love the details and creative use of the dies.
ReplyDeleteSooooooooo cute!!!!!!
ReplyDeletea-dorable!
ReplyDeleteSo clever & cute!
Cute!!!
ReplyDeleteSooo cute, love his little face!
ReplyDeleteAdorable!!! The kids in my class would LOVE to make this - thanks for the inspiration!!!
ReplyDeleteYou are so creative, Joni! How uh-dorable!!
ReplyDeleteSo cute!
ReplyDeleteAwwww this is so cute!
ReplyDeleteOh, this is so cute & creative!
ReplyDeleteAbsolutely delightful! I'm loving the paper you used to create your tote! Soooo pretty!
ReplyDelete~c
SO CUTE!!!! What a fun treat box!
ReplyDeleteSo cute - love the sweet little face and the sparkle.
ReplyDeleteisoscia at aol dot com
Oh gosh, this is super cute! Love!
ReplyDeletemarylouh
ReplyDeleteI love the Santa face on the little bag.
So darling
thanks for sharing.
Absolutely adorable :-)
ReplyDeleteWOWOWOWOOWOWOW!! Super CUTE!! I LOVE this and the FUN Idea!! THANKS for sharing and have a FABULOUS WEEK!! =)
ReplyDeleteThis is so adorable and so clever! Thanks for sharing!
ReplyDeleteYour bag looks so sweet, is so beautiful!
ReplyDeleteWhat a FUN gift bag Joni, I love it!!
ReplyDeletevery cute
ReplyDeleteThe little ones would love this Santa! Cute!!
ReplyDeleteTotally darling gift bag!!
ReplyDeleteThis little treat bag is just too stinking adorable Joni!
ReplyDeleteHow cute!!
ReplyDeleteThanks for your assembly explanation. You used all the little parts of the dies. I love it! The garland as the hat trim is genius.
ReplyDeleteAbsolutely adorable Joni!!
ReplyDeleteThank You~