Showing posts with label Surface Tags. Show all posts

Saturday, July 5, 2014

Surface Tag - Blog Hop & Giveaway!


If you are looking for Reverse Confetti Release Day 1, please click HERE.
.................................................................................................................................................


Hello...hello...this is my second post of the day  :)
Waffle Flower Crafts are having a Blog Hop!
Different ways of using your new Surface - Tag products.


For my project I created a flower using the Surface-Tag die Scallop Add-on.
Here's the photo below to give you an idea. You can just cut on any side of the scallop and start rolling. To secure I glue gun every roll. 


You can also use the inside scallop die to make a smaller flower. I just free hand cut the leaves on felt for added look.


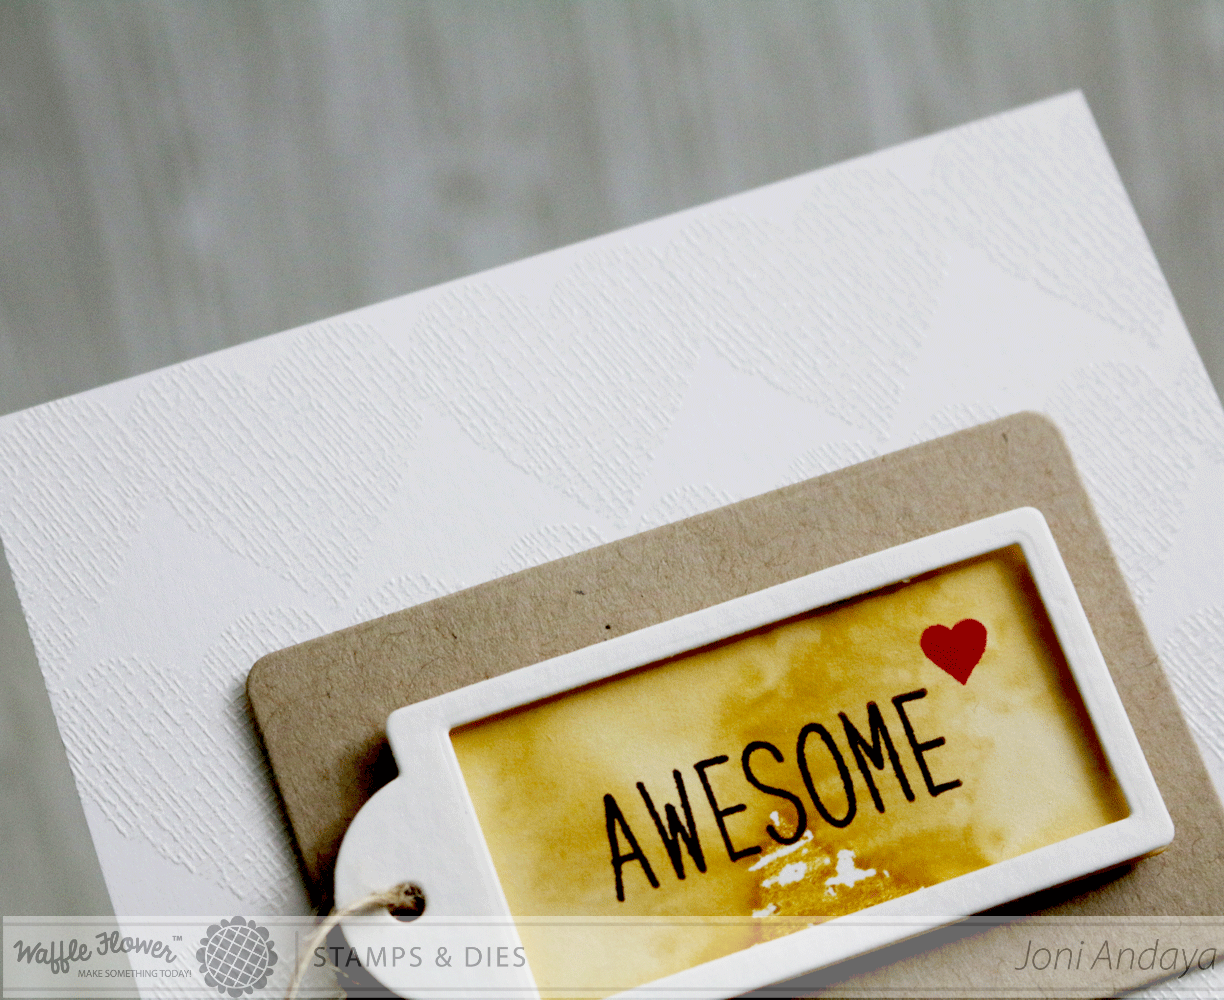
On this card I created a watercolor look on the background first using watercolor paper and distress ink pad.  I then added the Heidi Swapp Color Shine here and there on the card. I then use the same concept on the tag using the watercolor paper and die-cut the top using the double ended tag enforcer that's included with Surface - Tag dies starter Kit on gold cardstock. I then added the pink twine from Pretty Pink Posh for finalized the look.

For the sentiment I used the "Hey Beautiful" from the new released Bowtiful Additions Stamp Set stamped it with versamark and heat embossed on gold to finish the card with the flowers using the Surface Tag Die - Scallop Add-On.


You can just leave it into a tag...


of it can be easily add into a card :)


For the next project I couldn't help but make a hair clip added on the card, its just really fun to add something...something once in a while :).


Once I am done rolling the first flower, I then adhere another die-cut scallop add-on with a glue gun to create a bigger flower for the hair clip. I did this three times, 3 different color scallop yellow, pink, and fuchsia. 


Once the flower is done I added the hand cut leaves and adhere it with glue gun. Also here are some of the pieces I used to cover and secure the clip. The big circle is from the Lifestyle Crafts circle dies to used it as back cover. The pink tag reinforcer is from Surface Tag Die - Scallop Add-On.


This is how I put it together, make sure you use the glue gun for safe keeping, this will help secure it.


 Here's the look when its all done.


To insert the hair clip on the card I used the hole reinforcer that is included on the Surface Tag Die - Starter Kit really fun to use, you can easily put it anywhere and create a tiny hole.


The sentiment is from the same set Bowtiful Additions Stamp Set.


I hope you enjoyed this idea!
I hope you give it a try :)

Have a Wonderful Weekend :)
Don't forget to Hop to the other team's blog.


Giveaway

Leave comments along the way for chances to win a stamp set of your choice from Waffle Flower Crafts. Enter before midnight Eastern on July 8 and the winner will be announced on Waffle Flower Blog on July 9th.


Saturday, June 28, 2014

Surface Tag


Hello Everyone...today I am sharing with you some of the projects I created using the new release SURFACE TAG stamp set, Surface - Tag dies starter Kit, and Surface - Tag Scallop add-on.
There are just so many possibilities with this kit. The Waffle Flower design team will have a special post on July 5 on different unique ways of using this set :).

For my first project is very simple I used different patterned papers and die cut the tag from the Surface - Tag dies starter Kit, but instead of using the full size of the tag I made it shorter. I did this by hanging the portion of the tag on die-cut before die-cutting it. 


Next, I die-cut the double ended tag enforcer that's included with Surface - Tag dies starter Kit  on gold cardstock and adhere on top of the tag then adhere the tag with foam dots.
To finish of the card I gold embossed the sentiment "Happy Birthday" from the SURFACE TAG stamp set  and adhere on the top of the cut black piece of card stock on the tag.


To begin my second project, I created my card base then white heat embossed the heart image that's included on the SURFACE TAG stamp set. I stamped the heart on the whole card base as a subtle background. I hope you can see it in this image :).


Next, I die-cut the kraft cardstock using the rectangle die-cut for the tag that is included on the Surface - Tag dies starter Kit. I have to shorten the kraft tag, to shorten the rectangle tag I place the cut tag hanging at the end of the die to the portion of the tag.


Next, I die-cut the smaller tag die on the set and watercolor it in and let it dry. Once its dried I then stamped the sentiment "Awesome" from  the BOWTIFUL ADDITIONS stamp set and added the tiny heart from SURFACE TAG stamp set. I also die-cut another tag and used the small rectangle die from the Surface - Tag Scallop add-on to create a window then adhere with foam dots.


For the tag round reinforcer die, after die cutting I cut the middle of the sentiment on the middle like you see below. I did this to help the sentiment "thank you" to bend to fit on reinforcer. It does not damage the stamp it goes back on the same shape once I am done with it :). I really love that this small image can add so much on the project.


Here's the full image.


For my last project, I want to show you first the pieces that I used for my card.
On this project I used the rectangle die that's included on the Surface - Tag dies starter Kit, I also gold embossed the string image from the stamp set. I also used the round reinforcer and die-cut it on gold cardstock. The "Happy Birthday" sentiment is also from the stamp set. For the panel for this card I use a watercolor paper and did some watercolor using distress ink pad.

The larger rectangle tag I folded it to house the smaller tag on my card to create a pouch and adhere the gold embossed "just because" sentiment.


Here's the full image.


I hope you enjoyed!
Thank you so much for visiting me.

Have A Wonderful Weekend!