Hello Everyone...today I am sharing with you some of the projects I created using the new release SURFACE TAG stamp set, Surface - Tag dies starter Kit, and Surface - Tag Scallop add-on.
There are just so many possibilities with this kit. The Waffle Flower design team will have a special post on July 5 on different unique ways of using this set :).
For my first project is very simple I used different patterned papers and die cut the tag from the Surface - Tag dies starter Kit, but instead of using the full size of the tag I made it shorter. I did this by hanging the portion of the tag on die-cut before die-cutting it.
Next, I die-cut the double ended tag enforcer that's included with Surface - Tag dies starter Kit on gold cardstock and adhere on top of the tag then adhere the tag with foam dots.
To finish of the card I gold embossed the sentiment "Happy Birthday" from the SURFACE TAG stamp set and adhere on the top of the cut black piece of card stock on the tag.
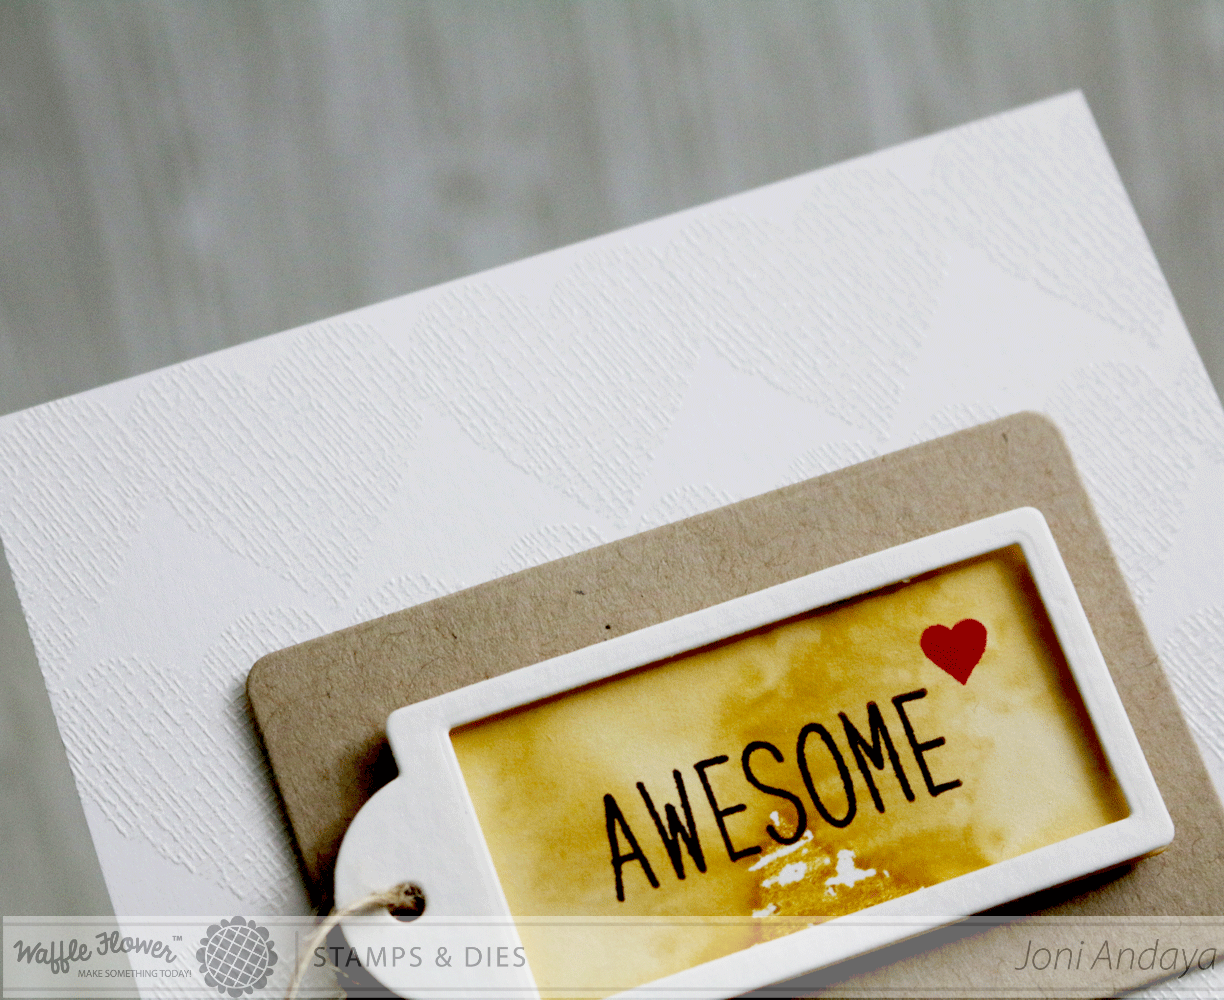
To begin my second project, I created my card base then white heat embossed the heart image that's included on the SURFACE TAG stamp set. I stamped the heart on the whole card base as a subtle background. I hope you can see it in this image :).
Next, I die-cut the kraft cardstock using the rectangle die-cut for the tag that is included on the Surface - Tag dies starter Kit. I have to shorten the kraft tag, to shorten the rectangle tag I place the cut tag hanging at the end of the die to the portion of the tag.
Next, I die-cut the smaller tag die on the set and watercolor it in and let it dry. Once its dried I then stamped the sentiment "Awesome" from the BOWTIFUL ADDITIONS stamp set and added the tiny heart from SURFACE TAG stamp set. I also die-cut another tag and used the small rectangle die from the Surface - Tag Scallop add-on to create a window then adhere with foam dots.
For the tag round reinforcer die, after die cutting I cut the middle of the sentiment on the middle like you see below. I did this to help the sentiment "thank you" to bend to fit on reinforcer. It does not damage the stamp it goes back on the same shape once I am done with it :). I really love that this small image can add so much on the project.
Here's the full image.
For my last project, I want to show you first the pieces that I used for my card.
On this project I used the rectangle die that's included on the Surface - Tag dies starter Kit, I also gold embossed the string image from the stamp set. I also used the round reinforcer and die-cut it on gold cardstock. The "Happy Birthday" sentiment is also from the stamp set. For the panel for this card I use a watercolor paper and did some watercolor using distress ink pad.


You are amazing!
ReplyDeleteAWESOME cards Joni...
ReplyDeleteI agree with Amy, she took the words right out of my mouth!! I love the tiny thank you you added to the reinforcer, very eye catching!!
ReplyDeleteThese are amazing!! U r such an inspiration, this set looks like a must have !
ReplyDeleteWOW, Joni!!! Stunning cards!!! Love!
ReplyDeleteOh wow, all three of your cards are spectacular!! I just love everything you create, Joni!! Fabulous!! Have a great day :)
ReplyDeleteLisa
A Mermaid's Crafts
All of these are so gorgeous. You really are a rock star with your cards.
ReplyDeleteLOVE!!! :)
ReplyDeleteYou are so creative & talented, Joni! I love seeing what you come up with & these are all incredible!
ReplyDeletewonderful post! Love you have stretched these stamps/dies and shown some great new possibilities!
ReplyDeleteYou are amazing,Joni!! WOW! I love each one of them!!!
ReplyDelete