Thursday, July 31, 2014

A Little Something


Hello Everyone...just a quick post.
Just playing along with Fusion Card Challenge!

What pretty colors :)


For my card I used the Wplus9 Spring Blooms and Fresh Baked for the sentiment.
Really love how this turned out, really simple card but very sweet in colors.
For the chevron pattern paper I use the Sky's the Limit from My Mind's Eye, but before adhering the cut 
patterned paper I distress the white card base first with Peacock Feathers to get the hint of blue then stamped the sentiment. The flower and leaves images are fussy cut and adhere with foam tape.


I hope you enjoyed!
Thank you so much for stopping by!


Have a Wonderful week :)

Monday, July 28, 2014

Card for Kids


Hello Everyone...today its my turn to share something using Waffle Flower Crafts. Something we can make for our little kiddos, since the school is about to start.  I made a boy and girl bear using the ROCK MY WORLD, HEY MR, and BOWTIFUL ADDITIONS stamp sets. I hope you like it...don't you think they're cute?


A very simple card to make for the kids :)


1. To begin I used a kraft cardstock for my panel, and create the snout for the bear using the biggest rock image from the ROCK MY WORLD stamp set, I used the back of the stamp for the snout white heat embossed it on the kraft cardstock.
2. After stamping the largest rock I then used the versamark ink to stamped the water image for the pail from the HEY MR stamp set and gold embossed it to create the nose image for the bear (see below picture).
3. I then fussy cut the stamped image and adhere with foam tape for dimension :)


4. To create the eyes I stamped the smallest rock image from the ROCK MY WORLD stamp set. For the girl bear I just added some lashes using Copic markers for the boy bear it just remain as is.
5. For the girl bear I added some blush on her cheeks using Spun Sugar distress ink, to make her cheeks rosy.
6. For both girl and boy bear I used the stitched bow image from BOWTIFUL stamp set and BOWTIFUL DIE SET. Bow tie for the boy bear and bow for the head for the girl.
7. The sentiment is from the BOWTIFUL  (You're) and BOWTIFUL ADDITIONS  (Awesome  & Fantastic!) stamp sets.


Here are both of the cards :)


I hope you enjoyed!

Thank you so much for stopping by :)
 HAVE AN AMAZING WEEK!


Saturday, July 26, 2014

Birthday Wishes


Hello Everyone...today I am participating at 
Fusion Card Challenge.


For today I used both the photo and the sketch!

1. To begin my card I stamped the white card base with wood grain image from Wplus9 Dockside Background in grey.
2. Then die-cut the numbers from Wplus9 Modern Numerals dies set on a white card panel and adhere.
3. Next, I adhere some strip of Kraft cardstock and aqua patterned paper on top of the card.
4. I then stamped and die-cut the images from Wplus9 Whole Lotta' Happy stamp and dies.


5. I added some natural twine on the balloons and gathered on the bottom of the card with the vellum.
6. The strip of vellum is stamp and gold embossed with the sentiment "Birthday Wishes" from the Whole Lotta' Happy set.
7. Also added some sequins from Pretty Pink Posh in Marigold, Marshmallow, and Pink Blush to finish off the card.


Here's the full view.


I hope you enjoyed!
Fusion Card Challenge

Thank you so much for visiting!
Have a Wonderful Day!!!

Friday, July 25, 2014

Lemonade Anyone?


Hello...hello...participating at CAS(E) this Sketch #86 this week.


For my card  I used the stamp set from Reverse Confetti FRESH 'N FRUITY (lemons).

1. To begin, I stamped the sentiment "when life hands you lemons, make Lemonade" on the card base to create the background in grey. 
2. Following the sketch, I cut a strip of kraft cardstock and adhere on the side.
3. For the focal point I die-cut the scallop and circle from Circles ‘n Scallops Confetti Cuts.
4. Next, I adhere the stamped and die-cut lemons from the set.
5. Added some white resin flower from KaiserCrafts and sequins from Pretty Pink Posh in Marigold, Lemon Meringue, and flowers from Summer Embellishment Mix to finish off the card.


I hope you enjoyed!
CAS(E) this Sketch #86 

Thank you so much for visiting me!


Have an Amazing Day!

Thursday, July 24, 2014

Premiere of Scenery: V for cheVron - Day 4


Hello...Everyone, today mark the 4th Day of the release at WINNIE & WALTER.
Remember that all the products will be available tomorrow July 25th at midnight!


Its all about...Scenery: V for CheVron  today.

For my card I stamped the big chevron image from the set with grays, pinks, golds.
I also added some flowers from The Big, the Bold, and Extras. I also added some clear chunky glitters on my card.

The sentiment is from the The Big, the Bold and You.


Here's the full image.


I hope you enjoyed!

Thank you so much for visiting.
Don't forget to stop by at WINNIE &WALTER's blog for a GIVEAWAY!


Have a Wonderful Day!!!

Wednesday, July 23, 2014

Premiere of The Big, the Bold and Seasons - Day 3


Hello..hello we are the stretch of the WINNIE and WALTER released!
Day 3 is all about....The Big, the Bold and Seasons.
Includes thirty (30) stamps with four (4) large words: autumn, spring, summer and winter, four (4) icons and twenty-two (22) small words


For my card I used the pretty word "summer" since I moved here to north CA I have been missing the real summer in the east coast FL.

I decided "summer" will be perfect for ice cream. I created my image by watercoloring the ice cream on the watercolor paper. I drew the ice cream shape with a light pencil mark on my watercolor paper, and then cover it with distress ink that I diluted with water on heat mat. 


For the cone image I used one of the pennant image from Scenery: It's a Wonderful Pennant. I stamped the image first on the watercolor paper using very light ink the Antique Linen distress ink is perfect for this effect. After stamping with light ink, I then color it with a darker ink like Vintage Photo distress ink. Distress markers will work very well too, I usually let it dry every layer of my color before watercoloring it again to get the intense color I am going for.


When all the coloring and cutting are done I simply adhere the ice cream on the cone and added some foam tape for dimension. The card base I used is also watercolor paper, I did some ink splattering before adhering the cone.

For the sentiment "have a" and "fun" are from the past released The Big, the Bold and Fun. The "summer" sentiment that will be released this July 25 is heat embossed in gold on vellum, fussy cut, then adhere with clear foam tape.

To finish off the card I added some self-adhesive white and gold pearls from Creative Imaginations.


I hope you enjoyed!
Thank You so much for stopping by!

Remember all the products will be available on July 25th at midnight.
Also, don't forget to stop by at Winnie and Walter's blog they are doing a GIVEAWAY!


Have a WONDERFUL week :)

Tuesday, July 22, 2014

Premiere of Scenery: It’s a Wonderful Pennant - Day 2

Hello Everyone, happy Day 2 July Release at WINNIE & WALTER.
Scenery: It's a Wonderful Pennant

This is a super fun set, that I'm sure you will love.


1. For my card I first created my background using the Scenery: Big Bang Confetti, my all time favorite (stars). 
2. Next, I stamped the pennants on a separate watercolor paper with versamark ink and white (heat) embossed it then watercolor each one.
3. I then fussy cut each pennant and adhere with foam dots.
4. For the sentiment, I used the new release "welcome" The Big, the Bold and Blessings that was featured on the day 1 of the released HERE. It's heat embossed in gold, the "baby" sentiment is from the The Big, The Bold, and the Happy set.
5. I added some Pretty Pink Posh sequins in Sand and Sparkling Clear. I also added a hot pink resin flower from KaiserCrafts to finish off the card.


1. For my second card, I used the pennant as a hat for my face image I created using the bubble stamp from Bubble Talk set.  
2. Its a one layer card did some simple masking for the hat, then stamped the bubble stamp to create a face.


3. Next, I just used a black pen to draw the eyes and mouth, of course you can use the googly eyes too...that will be fun for sure. The cheeks is colored with Copic marker and added some white dots using Uni-ball signo pen.
4. The sentiment is from the same set Bubble Talk .


I hope you enjoyed!

Thank you so much for visiting!
Remember all the products will be available on July 25th at midnight.


Don't forget to stop by at Winnie and Walter's blog they are doing a GIVEAWAY!


Have a WONDERFUL Day!!!


Monday, July 21, 2014

Premiere of The Big, the Bold and Blessings - Day 1


If you are looking for the Neat &Tangled with Pinkfresh Studio Hop please click HERE.


Hello Everyone this is my second post of the day.
Today mark the first day previews from WINNIE & WALTER's July Released!

We are all for the The Big, the Bold and Blessings, Gorgeous fonts that we all love.

For my card I added the tan striped washi on the side of the card base and added a strip of yellow cardstock.
I then, use the Scenery: Big Bang Confetti set for the background of the card base.
The sentiment "grateful" is stamped, fussy cut, and adhere with foam tape on the old October Afternoon sticker set.

To finish off the card I added the Pretty Pink Posh sequins in Marshmallow and Lemon Meringue.


I hope you enjoyed!
Thank you so much for visiting!

Don't forget to stop by at Winnie and Walter blog for a Giveaway!

Have a Wonderful Monday :)

Neat & Tangled with Pinkfresh Studio Hop!


Hello Everyone...Happy Monday!
Today Neat & Tangled and Pinkfresh Studio are joining forces.

If you came from Ashley Horton's blog you are on the track :), if not
you can start HERE so you don't miss anything.


For my card I used the Pinkfresh Studio Think Less live more stamp set and Ombre Peach & Mint washi.
Neat & Tangled A Long Time Ago (sentitments) and Gifts For You (flowers/hearts) stamp set.

I adhere the washi  on the side of the card base. The white panel is stamped with flowers and hearts. 
The sentiment is gold embossed in vellum and the girl and boy image is fussy cut then adhere with foam dots.
I the the bow to finish it off.


For my second card I gold embossed the N&T Time Warp image on vellum. I fussy cut the girl from N&T
Gifts For You set, colored, and adhere on top.
I also added the gorgeous foil alphas from Pinkfresh Studio in Ocean Gold.
The sentiment "for you" is also from the N&T Gifts For You set.


I hope you enjoyed!
Thank you so much for visiting!

Your Next stop is at Clare Prezzia's blog. 

Have a Wonderful Monday :)

Thursday, July 17, 2014

N&T July Release - Punchinella


This is my second post of the day. 
If you are looking for Reverse Confetti ON CAMERA Please click HERE.
........................................................................................................................


Hello...hello....today is the day!
You can find all the new products here at
Neat & Tangled Store.


We are showcasing PUNCHINELLA stamp set and PUNCHINELLA STENCIL...definitely a fun set.


For my project I used the Punchinella stencil as a background together with the watercolor and I also gold embossed the PUNCHINELLA stamp set behind the boat image  from SAILMATES stamp set .


For my card I added some watercolor panel using Peacock Feather distress ink.
I also added a piece of kraft cardstock, another colored watercolor paper, vellum stamped with PUNCHINELLA stamp, and the cute boat image from SAILMATES along with the sentiment from the set.  


I hope you enjoyed!

Thank you so much for Stopping By!
Neat and Tangled is also doing a Moving Sale.


Have a Wonderful Day!

I'm On Confetti Camera!


Hello Everyone today is CONFETTI CAMERA day over on the REVERSE CONFETTIBLOG.  Every Thursday, one of the Confetti Crew designers offers her creative process about the project created just for that day.  Today it's my turn, I'm sharing another fun way to your new sets flamingo…*hint* using some of the latest Reverse Confetti products! 

 Reverse Confetti Blog

  It will make my day if you will check it out HERE! 

 Thank you so much for stopping by!
Have a FABULOUS Day.

Wednesday, July 16, 2014

Add Images on your Mailable 3D Bow Template Die

If you are looking for the Reverse Confetti July Color Challenge please click HERE.
If you are looking for Day 3 post for Neat & Tangled please click HERE.
.............................................................................................................................................


Hello Everyone....this is my third post of the day :).
I know many of you really love the Mailable 3D Bow Template Die.
I want to show you how easy to stamped your images on the bow to create a unique customize design. 
Any of the Waffle Flower Crafts stamp images will work or any of your stamp images that you already have will work as well.


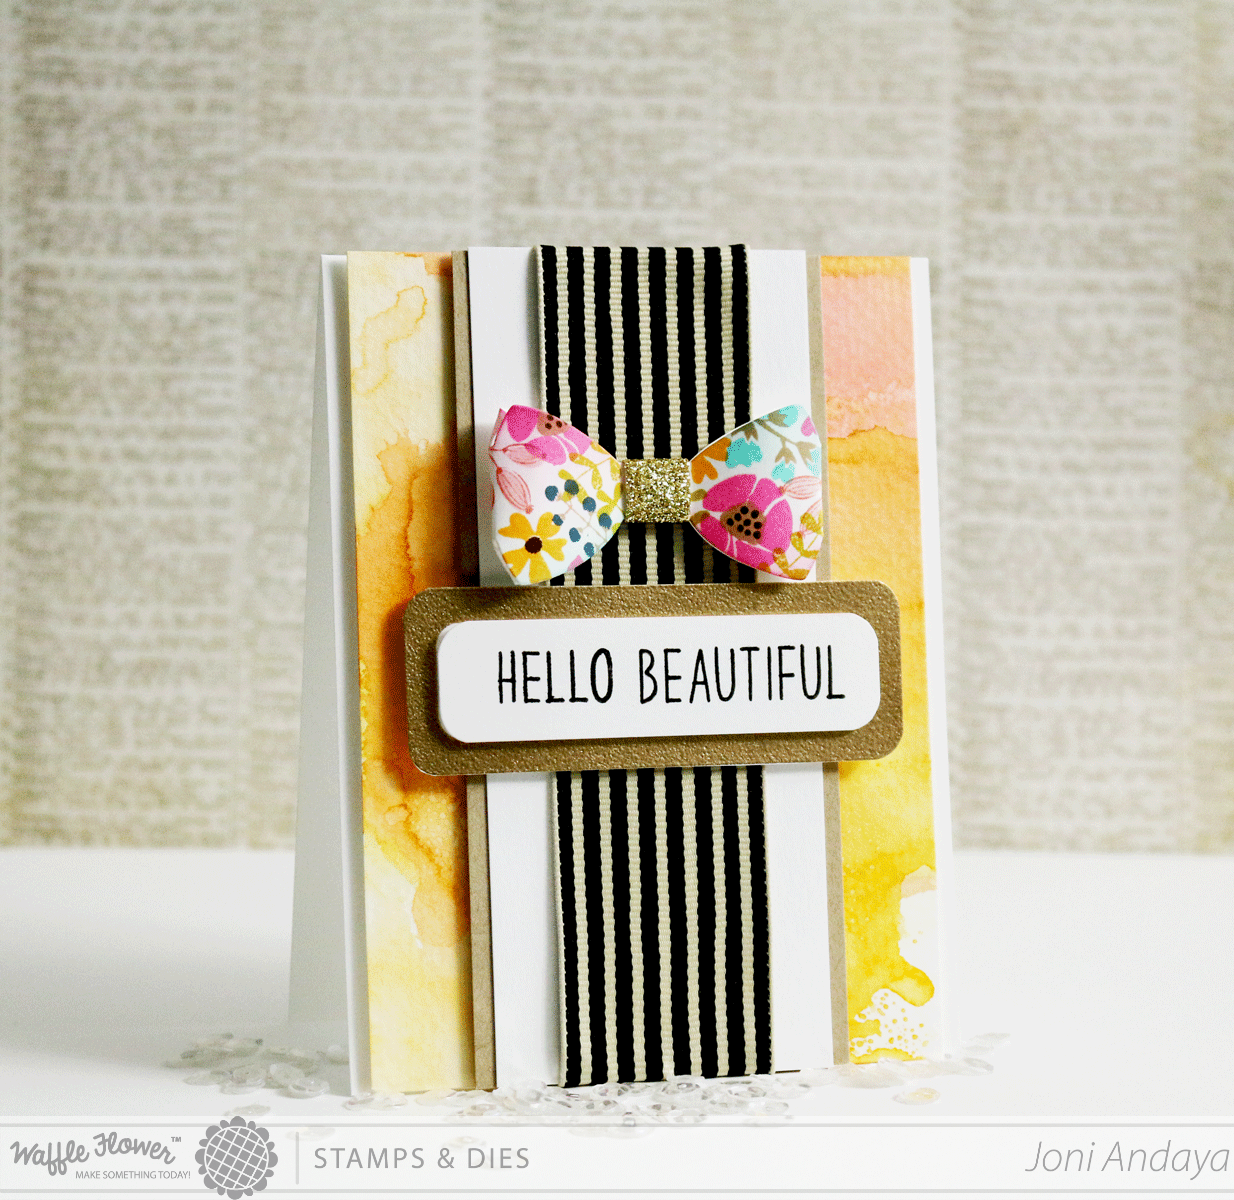
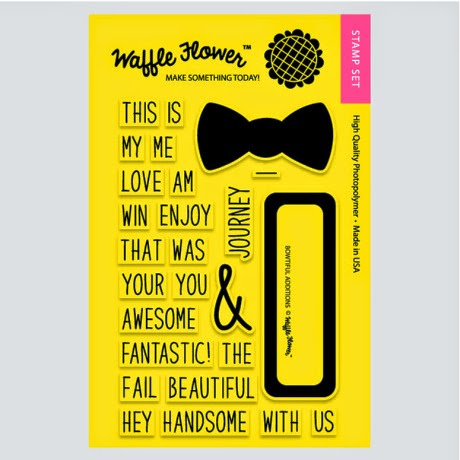
For my card project I used the products BOWTIFUL ADDITIONS (label border),
 MAILABLE 3D BOW TEMPLATE Die (bow), and LOVED stamp set (flower images)

THE PIECES: White card base, Watercolor paper that's smooched on the heat mat with water distress inks, strip of kraft cardstock, strip of white cardstock, black/white ribbon stripe from May Arts, fussy cut 
label (I changed it from pink to gold embossed instead) from BOWTIFUL ADDITIONS, the sentiment "Beautiful" is also from Bowtiful Additions "Hello" from BOWTIFUL stamp set.


Here's How I created the BOW, stamping the images from LOVED stamp set. You
can also use other stamps from Waffle Flower Crafts if you prefer.


The way it looks when it all comes together adhering the pieces with foam tape.


Here's the full image.

I hope you enjoyed!
Thank you so much for visiting me :)


Have a GORGEOUS week Creating!!!


Mailable 3D Bow Template Die

LOVED stamp set 

BOWTIFUL ADDITIONS